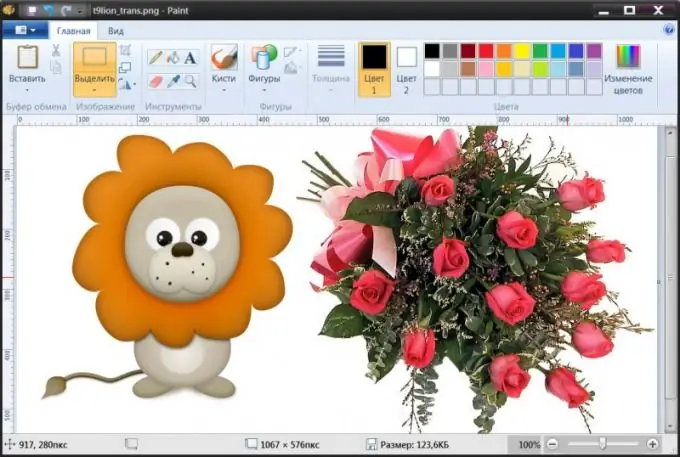
The Paint raster graphics editor was originally created as a curriculum project for several senior American students. Today, two of them work for Microsoft, and Paint is distributed with every distribution of the Windows operating system. The capabilities of this tool are quite sufficient for solving many common graphics processing tasks, including combining two source photos into one.

It is necessary
a computer with a Windows operating system
Instructions
Step 1
Launch Paint and load the main photo into it. These operations can be combined if you right-click the photo thumbnail in Explorer or on the desktop, go to the Open with section in the context menu and select the Paint line. If you have already loaded the graphics editor through the Start menu, then to call the dialog for opening the desired file in it, it is convenient to use the Ctrl + O key combination. Consider the main photo that should be on the right or on top of the final image.
Step 2
Add extra space in the main photo to accommodate the second photo. The easiest way to do this is by moving the anchor points - they are placed on the right and bottom borders of the image, as well as in its lower right corner. You can move them by holding down the left mouse button. Increase the width or height (depending on where you want to place the second photo) with a margin. At the end of the procedure, the excess space can be removed in the same way.
Step 3
Upload a second photo. To do this, open the "Paste" drop-down list on the "Home" tab in the Paint menu and select the "Paste from" command. In the dialog that opens, find and select the required file, and then click the "Open" button. Paint will place the second photo on top of the first and enable editing mode.
Step 4
Move the second photo to the desired location and set the correct dimensions for it. You can move the image highlighted by the dotted frame by dragging it with the left mouse button, and it is not difficult to resize using anchor points - in this case there will be eight of them, four in each corner and in the middle of each side.
Step 5
Turn off the editing mode of the second photo by clicking with the mouse outside the selected area, and finally resize the combined image. After that, save the result of your work to a file - the save dialog can be invoked by opening the application menu by clicking on the blue button and selecting the "Save As" item.


