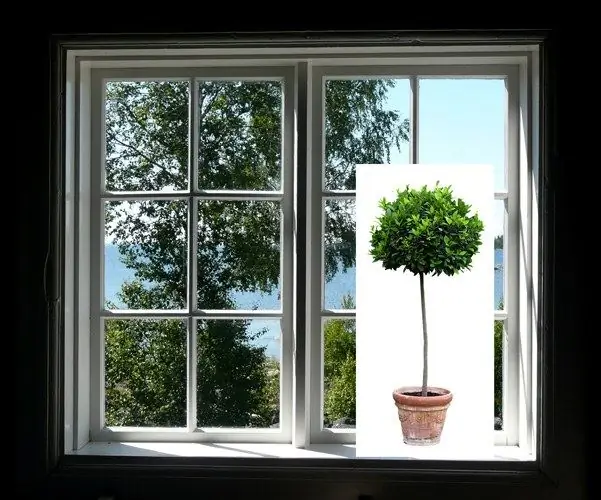
Inserting an image on a new background is one of the things you have to do when creating a collage. In order for the image to look natural in the new environment, you will need to remove the background of the added object, change its size and color gamut. All these operations can be performed using Photoshop.

It is necessary
- - Photoshop program;
- - image for insertion;
- - photo with background.
Instructions
Step 1
Open both pictures you are going to work with in a graphics editor using the Open option from the File menu, selecting two files at once.
Step 2
Select the entire image in the file with the inserted object and place it on top of the background layer with the photo. To select the entire picture, use the keyboard shortcut Ctrl + A, and you can copy the object using the shortcut Ctrl + C. Click on the window with the background and paste the picture by pressing Ctrl + V.
Step 3
Remove the background from the inserted picture. To do this, create a mask using the Add layer mask button from the layers palette. Select the Brush Tool and make the foreground color black. Click on the mask rectangle to the right of the layer icon and paint over the background of the pasted object. Shaded areas of the background should become transparent.
Step 4
Resize the pasted object so that it looks realistic in the photo. If the object is larger than necessary, make it smaller. If the inserted picture is too small, reduce the size of the background picture. To be able to edit the background, click on the photo layer and use the Layer From Background option from the context menu. To resize, apply the Free Transform option from the Edit menu. To ensure that the proportions of the image are not distorted during resizing, hold down the Shift key while transforming.
Step 5
Change the perspective of the inserted object if necessary. Such an operation may be necessary if the background photo and the photograph of the subject were taken from different angles. You can change the perspective using the Perspective option from the Transform group of the Edit menu.
Step 6
In order for the object inserted into the photo to look natural, bring its color gamut in accordance with the background color gamut. This can be done using the Levels or Curves tools, the settings windows of which are opened by options from the Adjustment group of the Image menu.
Step 7
Cast a shadow from the pasted object if necessary. To do this, duplicate the layer with the inserted image and load the selection from the mask using the Load Selection option of the Select menu. In the Channel field, select the channel with the word Mask in its name.
Step 8
Paint the selection with a dark color using the Brush Tool and remove the selection with Ctrl + D. Apply a Gaussian Blur filter from the Blur group of the Filter menu to the resulting shadow preset. Adjust the blur radius depending on how the shadows look in the background. If the shadows are soft, use a large amount of blur. To create a shadow with tougher edges, adjust a small blur radius.
Step 9
Place the shadow layer under the object layer and transform the shadow so that it falls on the surface at the same angle as the rest of the shadows in the photo. To do this, use the Free Transform option, holding down the Ctrl key during the transformation.
Step 10
Make the shadow more transparent by changing the value of the Opacity parameter. Remove the extra parts of the shadow by editing the layer mask.
Step 11
If you want to go back to editing the picture, save it to a psd file with all layers using the Save option from the File menu. A copy for viewing can be saved to a.jpg"


