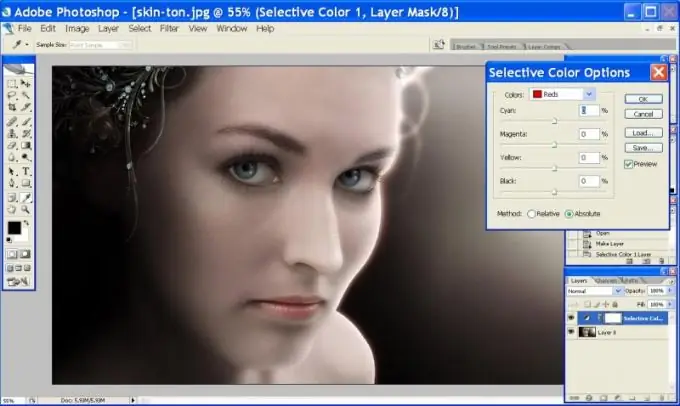
Using the graphics editor Adobe Photoshop, you can correct color imperfections in a photo. For example, change a faded skin color in too bright light or dark - in insufficient light.

Instructions
Step 1
Open the snapshot in Adobe Photoshop. At the bottom of the Layers panel, click on the Create new fill or adjustment layer icon and select Selective Color. A working layer-mask will appear on the layers panel, in which you can change the color scheme of the image. It is much more convenient than working directly with a photograph, since there is no risk of spoiling the original.

Step 2
In the Selective Color Options window, you can change the ratio of colors in the selected image by moving the color selection sliders. For example, to correct too pale skin color in a given photo, you need to increase the brightness of the red color. To do this, in the Colors list, select Red and reduce the brightness of the blue-green color (Cyan), since it is the opposite of red.
Step 3
To neutralize excess green, you need to increase the brightness of its opposite Magenta. The opposite of blue is yellow. So, to add warmth to this photo, you need to increase the brightness of the red, yellow and magenta colors. To do this, move the Cyan slider to the left and Magenta and Yellow to the right. Adjust the contrast with the Black slider.
Step 4
In the Colors list, select Yellow and change the settings for it as described above. When you are satisfied with the result, click OK. If you think the complexion has become too bright, lower the Opacity of the adjustment layer.
Step 5
Notice that the background color has changed along with the skin color. If you are not satisfied with the changes, click on the layer mask icon (white rectangle), select a black brush in the toolbar and drag it over the places where you want to restore the original image. You can change the hardness and opacity of the brush to remove all or part of the changes.


