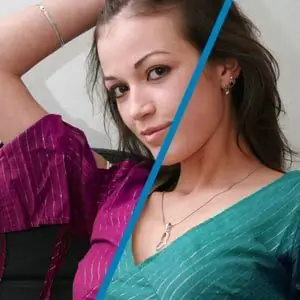
The capabilities of Adobe Photoshop, as you know, give almost unlimited freedom in changing the image of a person in digital photography. For example, using the tools of this program, you can choose a more successful color of clothing so that it harmoniously matches the color of the eyes, skin, surrounding interior, etc.

Instructions
Step 1
To carry out this procedure, it is necessary to perform two operations: - indicating and highlighting areas of the image where clothes are located, the color of which we need to correct; - in fact, the very change in the color shade of the selected fragments. You can create a selection in the Photoshop program in almost a dozen different ways. For example, you can to outline the contour of the required area with the Polygonal Lasso tool - this method is quite laborious, requires perseverance and a certain skill of manual work, but gives an excellent result. The fragment can be selected precisely and the nuances of the contour are under the control of the designer. You can use semi-automatic methods: the Magic Wand Tool or the Quick Selection Tool. If the color and geometric shapes of the fragment are quite radically different from the surrounding details, you can rely on the shoulders of automation - using the difference in color and contrast of the borders, the program can create a completely accurate selection. Unfortunately, this method will give significant errors in places where there is an accumulation of details in the image, sometimes even meticulous manipulations of the user, indicating "what to highlight and what not to highlight" do not give satisfactory results. If the clothes, the color of which we need to change, unique in its visual characteristics - there are no more objects of the same color and shade in the photo - then, provided that the photo is of sufficient quality, you can use another automatic tool - the Color Range option. (it can be found in the Selection menu). Based on a color sample, this tool builds a selection-mask, including image elements that have the appropriate tone. The range of selection can be expanded and narrowed, directly pointing to the image fragments that meet the desired parameters - the main color of clothing, the color in folds and shadows, light highlights, details, thus fully describing the color composition of the desired area. than the flickering contours framing the details of the image we need will eloquently speak, you can proceed to the repainting stage.
Step 2
There are also many ways and options. You can use one of the commands from the Image> Adjustments menu right after the selection. Almost each of them in one way or another, according to one or another algorithm, allows you to change the color of the image. The disadvantage of this method is one: the operation to change the color is carried out simultaneously over the fragment of the layer with the image, i.e. distorts the original information, and in the future it is already very difficult to change and correct the obtained result again without significant loss of quality. You have to "roll back" to the previous action and do everything all over again. There is another way - to create an adjustment layer. This method is more flexible, since, in fact, it does not change the information itself on the original layer, but only describes the mathematical color conversion function - a set of parameters and a method - which makes a visible change in real time, but these parameters can be modified at any time, which Even after performing other transformations of the image, it allows you to return to the color correction stage again, without any loss in quality. There are many types of adjustment layers, their list duplicates many options from the Image> Adjustments menu, and in terms of functionality, this method is not inferior to the previous one. such a layer, you can use the menu Layer> New Adjustment Layer (Layer> New adjustment layer), or click on the icon in the form of a black and white circle at the bottom of the layers panel. Next, you should select the type of color conversion algorithm. It should be noted that when creating a layer, if you previously created a selection, then the created layer will inherit this selection in the form of a transparency mask. This is very convenient, because this mask can be additionally corrected, and thus the mistakes of the previous stage can be corrected, especially if you had to rely on automation. Which color correction algorithm you choose depends on your specific situation. The Hue / Saturation algorithm is considered a fairly popular and simple tool, where using three parameters you can change the hue shift, saturation and brightness of the selected fragment. But other methods can be just as convenient. Experiment, try, choose. Again, remember that you can change the parameters of an adjustment layer as many times as you want without losing information in the original image. By gradually varying the parameters of the adjustment layer, correcting the blemishes of the mask, you can achieve quite realistic changes in the color of the clothes. Of course, for different parts of the image you can create as many adjustment layers as you like, each of which can control the color of a particular part of the clothing.
Step 3
When the work on the image is finished, save the image in two different formats: the "native" format of Adobe Photoshop - all your masks and adjustment layers will be saved in this file, so that later, without doing the laborious work again, you can always return to editing this picture, and the second file - in a generally accepted format for sending and sharing - for example, in the popular JPEG format.


