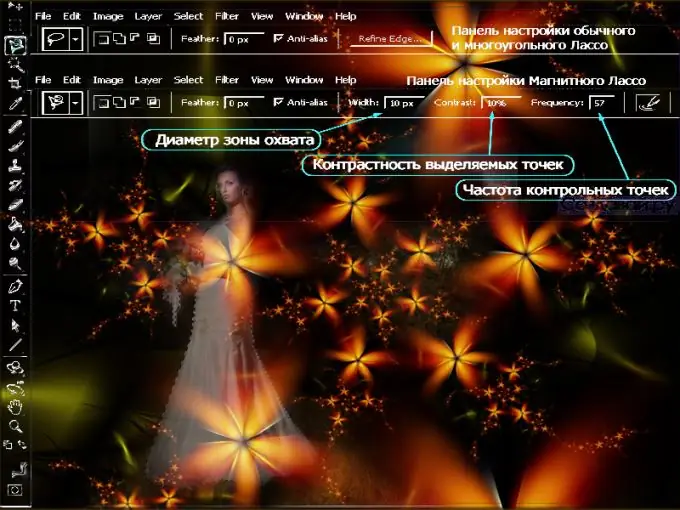
It is not an easy task to select an area of an arbitrary shape and non-uniform color in the image. This is done using tools from the "Lasso" group. All of them are located under the button with the image of the loop in the "Tools" panel. For shortcuts, use the L hotkey.

How a regular "Lasso" works
In theory, everything is simple. The tool allows you to create lines of any shape, as if you were drawing with a pencil. Click at the point from which the selection will begin, and then, without releasing the mouse button, move the cursor along the selection area. You must return to the starting point.
If you release the button earlier, the program will automatically complete the started selection with a straight line. But in practice, you are unlikely to be able to accurately trace a complex path. The mouse is too crude a tool, using the Lasso is convenient if you are using a graphics tablet.
Rectangular Lasso
The tool differs from the previous one in that it only draws straight lines. The Rectangular Lasso is great if the outline of the object to be selected consists of corners and many straight lines (for example, a star).
Click to set the start point and move the cursor along the path until you reach the vertex of the corner. At this point, make another click to create an additional point and change the direction of the selection.
Repeat this action until you select the entire shape and return to the starting point. When a small circle appears under the cursor, click the mouse to complete the selection.
Magnetic Lasso
When using this tool, Photoshop analyzes the colors of the pixels under the cursor and determines which ones should be selected. Magnetic lasso works well only against a simple contrasting background.
Click on the point where you want to start the selection and slowly move the cursor along the outline of the object. You do not need to hold down the mouse button. The program will automatically add attachment points to the contour line. To end the selection, move the cursor to the starting point.
If part of the selection passes through areas with little contrast or the outline of the object has sharp corners, you need to add some of your own anchor points by clicking on the selection outline. If the point is set incorrectly, move the cursor over it and press the Backspice key.
If part of the path forms a straight line, you can temporarily switch to the Rectangular Lasso tool. To do this, while holding down the Alt key, click on the point from which the selection should start along a straight line, and then at the point where it needs to end.
How to customize the lasso tools
All tool controls are located in the options bar. On its left side there are four buttons that allow you to select the tool's mode of operation: Create New Selection, Add To Selection, Subtract From Selection, and Intersect With Selection.
Feather blurs the boundaries of a selection; values are entered in pixels. The higher the number, the more blurred the selection outline. If you leave the field empty, the edges of the selection will be sharp.
If you check the Anti-Aliasing option, the edges of the selection will be slightly softened to smooth out the color transition between the background and the selection. The amount of smoothing is determined by the program automatically.
In addition to the already listed parameters, available for almost all selection tools, "Magnetic Lasso" has additional settings. Using them correctly, you can greatly simplify the work with the tool and improve the quality of the selection.
The Width parameter specifies the distance the cursor should be from the edge of the object. The default value is 10 pixels, but it can be changed from 1 to 256. If the outline of an object has many corners, the value should be decreased, and to select smooth objects, increased.
Contrast controls the difference in color between the background and the highlight. If the edges of the object differ little from the background, then try increasing the percentage, but it is better to use a different tool.
The value specified for Frequency affects the number of anchor points that the tool will create. If the selected fragment has a complex contour with many turns, corners, bends, the number of anchor points will have to be increased. By default, this field is set to 57, which is optimal for most cases.
"Changing the pressure of the pen changes the width of the pen" - the function with this long name is intended for owners of graphic tablets. Its use will allow you to change the width settings by pressing the pen on the tablet harder or weaker.


