For many novice PC users, there comes a time when the speed of the Windows operating system leaves much to be desired, and there is a desire to replace or update it. However, there is no disk or flash drive with the operating system at hand for the reinstallation procedure. Below is a step-by-step instruction on how to get out of this unpleasant situation.
Instructions
Step 1
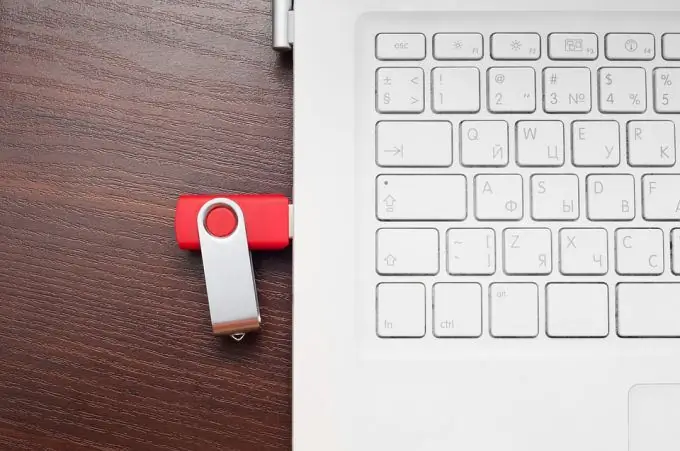
To get started, you need to perform a simple step - insert a USB flash drive into your computer or laptop. Make sure both the USB stick and the PC or laptop are in known working order and ready for the procedure.
Step 2
We download the Rufus program from the official site - a simple application that will help us in solving today's problem. Since the program does not require installation, you can use it immediately after downloading.
Step 3
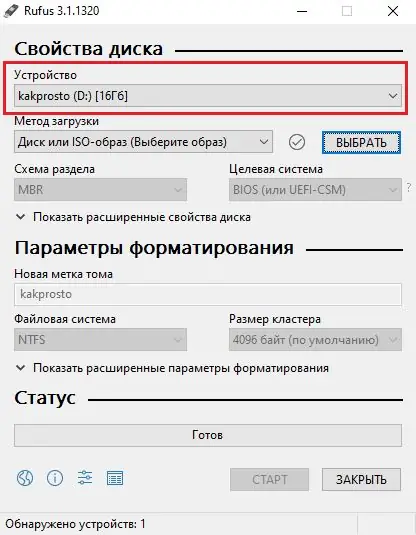
We launch the application. In the uppermost field "Device", select our Flash drive, into which the future operating system will be sliced
Important: the flash drive must have a volume no less than the operating system image, otherwise you simply will not be able to mount the image to the USB flash drive.
Step 4
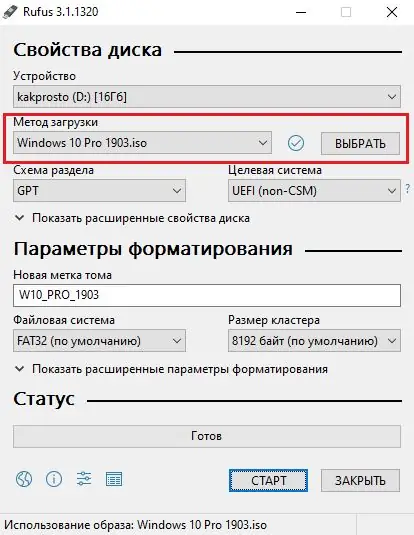
In the second line, "Boot method", you must select the "Disk or ISO-image" item, specify the path to the file for the program and select it as the image to be used for further slicing it onto a flash drive.
Step 5
An important step, since the wrong choice will force you to do everything all over again after you cannot start the installation process of the operating system on your computer or laptop.
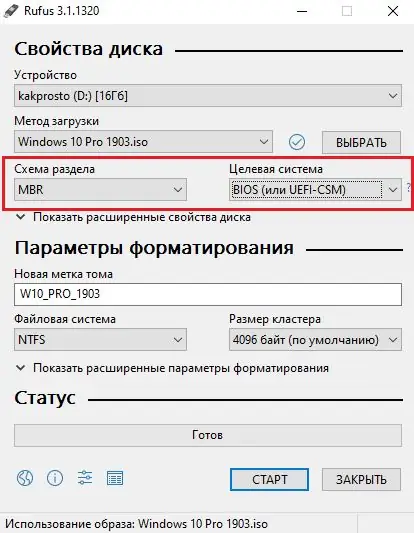
In the "Partition scheme" line, you need to select the "MBR" item to ensure compatibility with all devices on which you plan to install the future system. If you select "GPT", you may experience problems installing the system on older computers.
The "Target system" line when "MBR" is selected will be "BIOS (or UEFI-CSM)" and cannot be changed.
Step 6
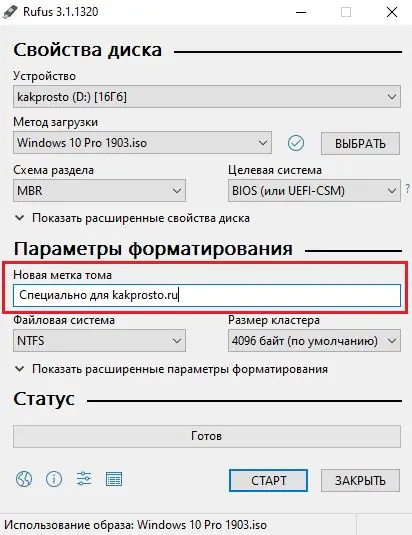
So we got to the "Formatting Options"
The line "New volume label" allows you to give any name to the future boot device, that is, our flash drive. Here, only your imagination limits you. We give any name to the flash drive and move on.
Step 7
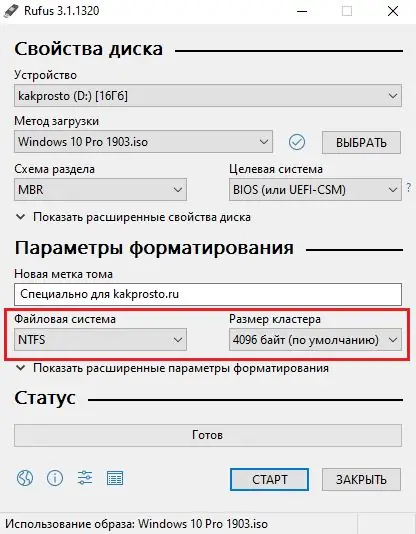
The "File system" line cannot be changed, as well as I do not recommend changing the "Cluster size", so here we leave everything as it is initially in order to avoid any problems.
Step 8
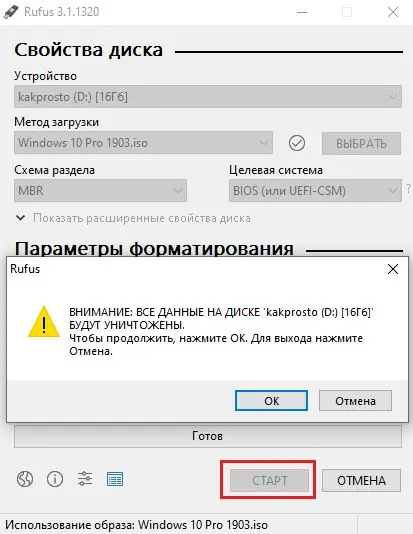
The setup for creating a bootable flash drive is now complete. It remains only to start the cutting process by pressing the "Start" button.
Important: the flash drive will undergo formatting, so you should take care of the safety of your data - transfer it to another flash drive or temporarily save it on a computer or laptop.
Step 9
That, in fact, is all. We are waiting for the program to do all the necessary file manipulations and you can safely install the operating system on a computer or laptop.
The time it takes to create a bootable flash drive varies depending on the performance of your PC, so please be patient and wait for it to complete.


