The popular social photo service Instagram does not allow you to upload widescreen panoramic photos. Some time ago, it generally supported only square photos and videos, with an aspect ratio of 1: 1, and this was a kind of "trick" of this service. Now you can also upload rectangular images, though they are far from panoramic. But you can still upload a panorama to Instagram, if you resort to one trick.
Necessary
- - Computer with Adobe Flash CS5;
- - panoramic shot;
- - smartphone with installed Instagram application.
Instructions
Step 1
Let's take advantage of the fact that you can upload videos to Instagram. Let's make a 15 second video from our panoramic photo (this is the maximum video length that Instagram can upload). The panoramic shot will move from one edge to the other, creating an interesting animated panorama effect.
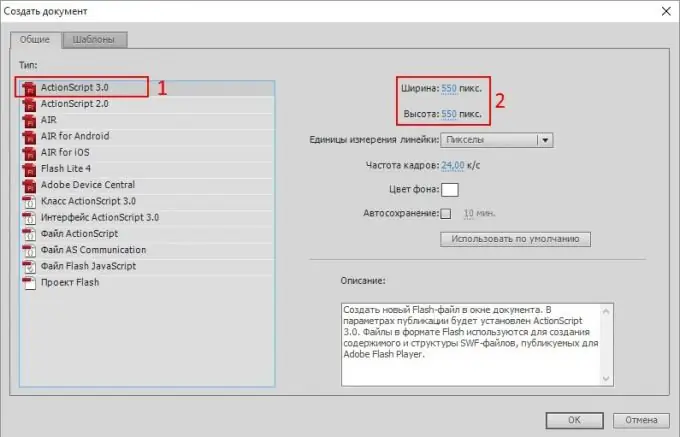
So, let's launch Adobe Flash CS5.5 or any other more or less new version. Select the "New …" option from the "File" menu. In the window that opens, select ActionScript 3.0, set the scene height equal to the height of your panoramic image in pixels. Set the width to the same as the height. We leave the frame rate as it is.
Step 2
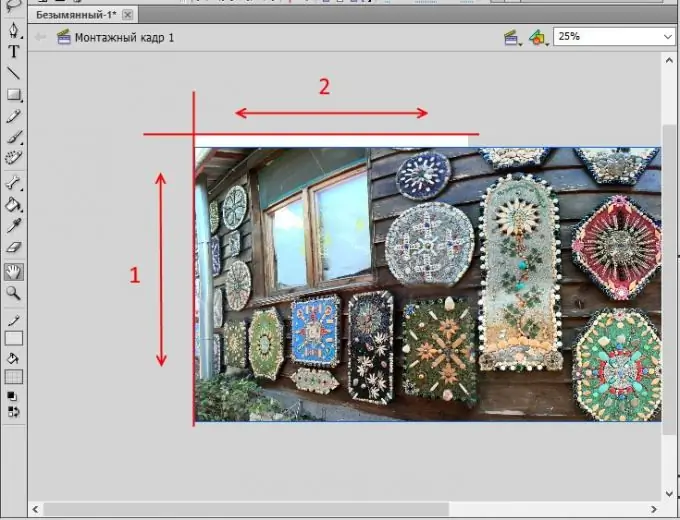
When the scene is created, go to the "File" menu again. Click "Import" -> "Import to the workspace …", or simply press the key combination Ctrl + R. A file selection dialog box will appear. Choose your panoramic shot. It should appear in the work area. Let's align it so that it fits in height into the white field of the scene.
If you want your panorama to move from left to right, then align the panorama image so that the left side of the image is aligned with the left side of the scene. If you want to move the panorama from right to left, then match the right side of the picture and the right border of the scene.
Do not forget that you can change the view scale if the working area does not fit entirely on the screen. At the top right above the working area there is a drop-down menu with viewing scales. The default is "100%".
Step 3
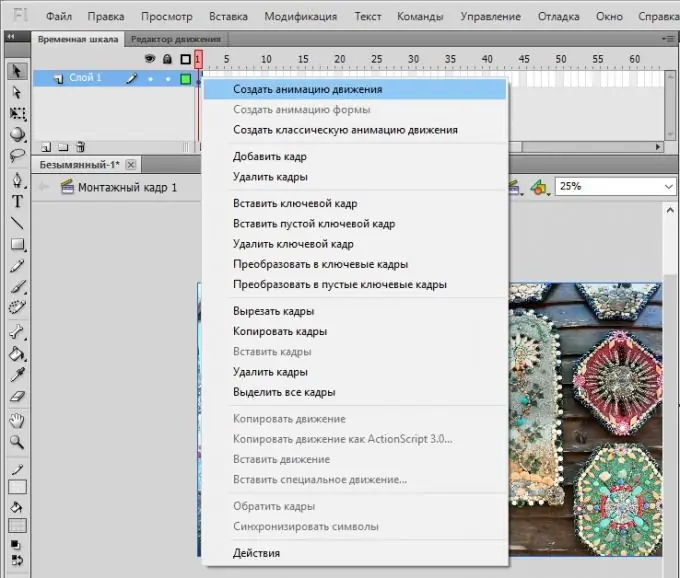
Now in the working panel "Timeline" click on the first frame (a rectangle with a black dot inside) with the right mouse button, and select the item "Create motion tween" from the menu that appears. Now the 1st frame has been stretched to the 24th frame, because we set the frame rate to 24 frames per second in the settings.
Step 4
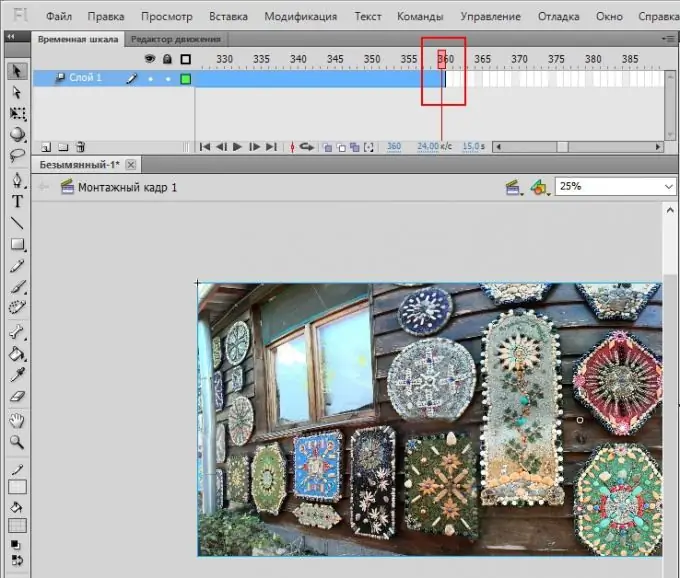
Now you need to calculate how many frames you need to create. If Instagram allows you to upload 15-second video clips, and we set 24 frames per second in the settings, then 24x15 = 360. That is, we need to create 360 frames.
To do this, take the first frame with the left mouse button and stretch it to the right along the timeline up to the 360th frame.
Step 5
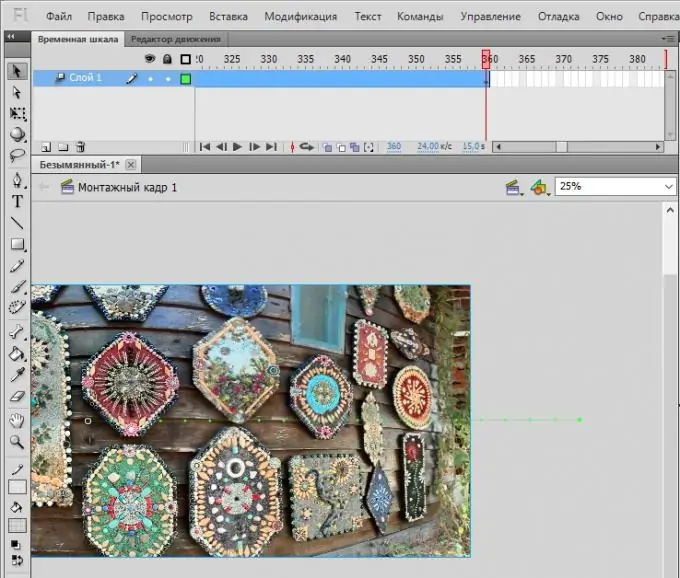
It remains only to align the panoramic image on the right side of the working area. To do this, select the upper tool in the toolbar - "Arrow" (or press the "V" key) - and align the image along the right border with the mouse or arrow buttons. After that, the tween is complete.
Step 6
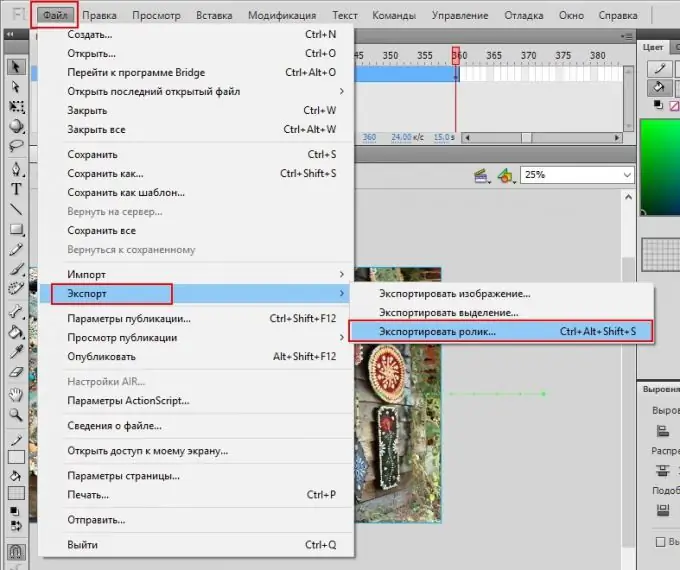
Export the resulting animation to a video. Select the "File" menu -> Export -> Export movie …
Step 7
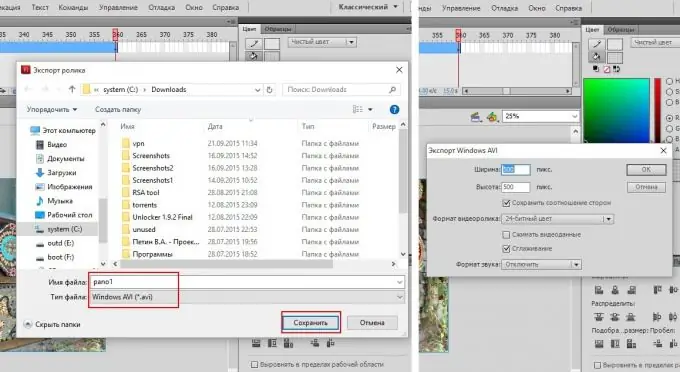
We select the location of the file, set the name and select the format "*. AVI". Click "Save". Set the video resolution, leave the rest by default and click "OK".
Step 8
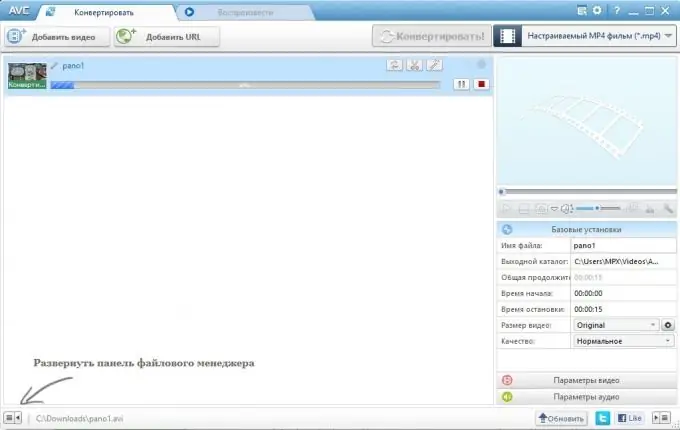
The "avi" format "weighs" a lot, so it is advisable to convert it to "mp4". For this we use the free AnyVideoConverter program, or simply "AVC Free". Let's add our avi-file, set the output format to mp4, click "Convert". In a few seconds, the process will end, and a video file with our panorama will be created, but ten times smaller in volume. (For clarity: the original file in the "avi" format weighed 659 MB, and the converted one - only 3.4 MB).
Step 9
The last step is to upload the new file to our device, which has the Instagram app installed, and upload the video to Instagram.
In such a simple way, you can lay out very "long" panoramas, including circular ones.


