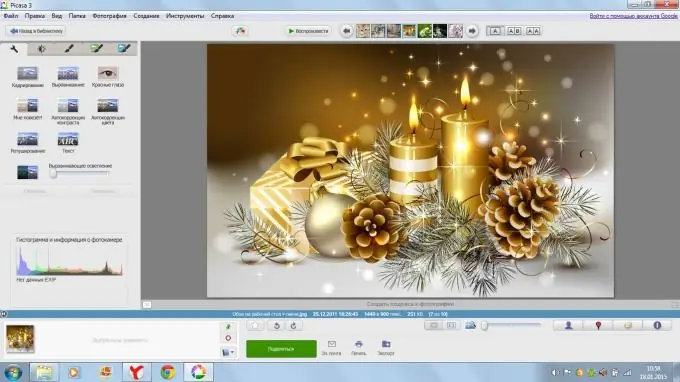
Many people like to be photographed, but not everyone gets perfect photos. If buying an expensive professional camera or attending courses on the basics of photography is not part of your plans yet, Picasa 3 editor will help you to "reach" photography to the desired level.

The editor for Windows XP / Wista / 7 operating systems can be downloaded from the official site of Picasa. The interface language is Russian, which greatly facilitates the acquaintance and further work with the editor.
When you open the editor for the first time, all the photos on your computer automatically go to the editorial base, so you don't have to search and open the file you need manually.
The work tool area is on the left and includes five sections: Frequently performed operations (wrench-shaped button), Lighting and Color Correction (black-and-white sun button) and three untitled sections (brush buttons), which includes various filters and effects for image processing.
1. "Frequently performed operations". The section consists of 9 functions. You can crop your photo by cropping, remove red-eye, and smooth using tilt.
The retouching function will help remove unnecessary elements in the background, smooth out wrinkles on the face or remove a hated pimple. The brush is adjustable in size, which allows you to eliminate even small defects. Auto color, ambient lighting and contrast features let you adjust the brightness and color of your photos with a single click.
2. "Correction of lighting and color". If the auto correction doesn't suit you, you can always switch to manual correction and edit the photo in terms of brightness to your liking. The section includes functions for shading, lightening and adjusting the color temperature (the so-called warm and cold light).
3. Filters and effects. Feel like an experimenter and try one of the 36 filters and effects presented in the program to your photo: sharpen or saturate, age with the 60s-style effect, or add some romance to the image with the functions "shine" and " sepia "(brown tint).
You can transform a photo into a frame from a movie thanks to the "cinemascope" effect. And for those who like their own portraits, the "pencil" effect is suitable, with the help of which the photograph will turn into a pencil drawing.
Some of the effects can be adjusted and adjusted to suit your needs, and the power can be increased or decreased using the scroll wheel. Do not be afraid to accidentally click the wrong place - the program asks for clarification every time: whether to apply this effect or not, and all changes can later be canceled, leaving the photo in its original form.


