To create a congratulatory film, video for YouTube, presentations, the installation of its individual elements is required. To do this, it is advisable to use the ProShow Producer program. With the help of its functions, it is possible to combine several videos into one, add music and different objects (pictures, drawings, photos).

Instructions
Step 1
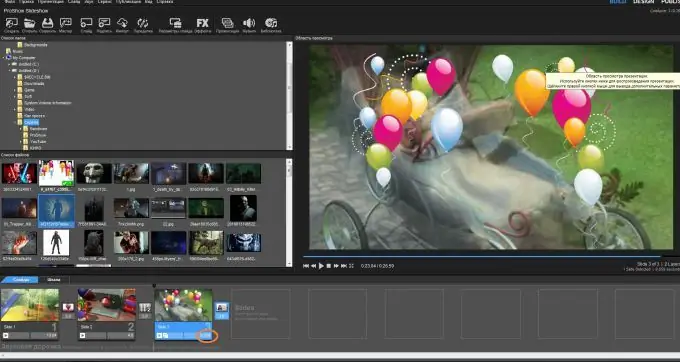
The ProShow Producer program has an accessible and understandable functionality that even a beginner can master. To combine several video or photographic materials, you need to drag the necessary objects into the cells with the mouse cursor, wait for the loading for a while. Next, you should pay attention to the duration of the video, since the time indicated in the program may not coincide with the real one. In this case, it must be corrected manually.
Step 2
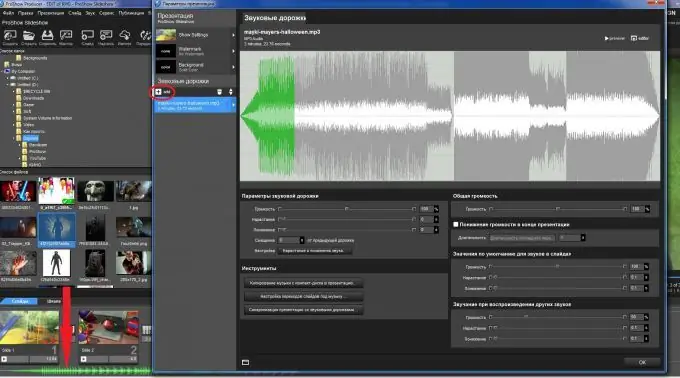
Add a sound file. An audio track is located under the slides; double-click on it with the left mouse cursor. After you have entered the sound track, add a sound file by clicking on the "+" button. Select pre-downloaded music, open it in ProShow Producer.
Step 3
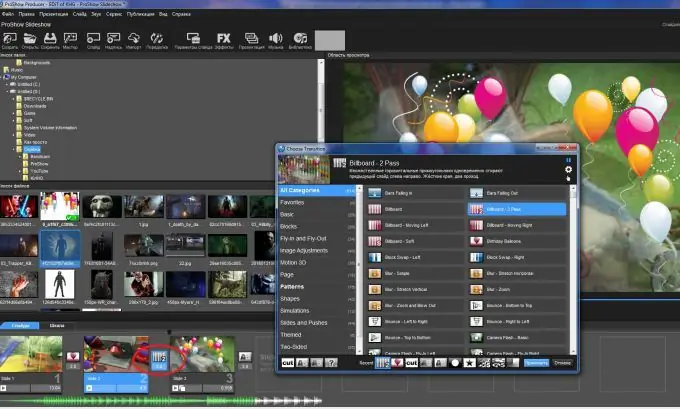
In ProShow Producer it is possible to change transitions between videos, which will create an interesting visual effect when changing images. The latter can explode, fade out smoothly, rotate, and so on. To do this, go to the menu with options by clicking on the transition between the slides. From the list of proposed ones, click on the type you like.
Step 4
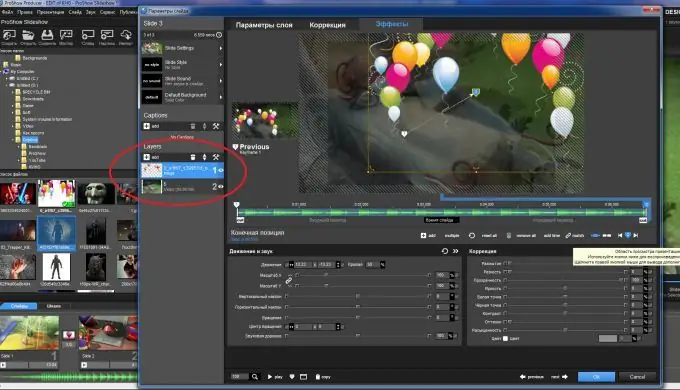
In this program it is possible to add objects: pictures, photos, inscriptions, drawings processed in Photoshop. In this case, they can be superimposed on an already inserted slide with a video or photo. To do this, double-click on the desired slide, then on the "+" sign. We go to the tab add an image or video, find the desired object in the computer and open it in the program. Next, you need to configure the object, indicating its parameters: location (using the mouse button), size, color.
Step 5
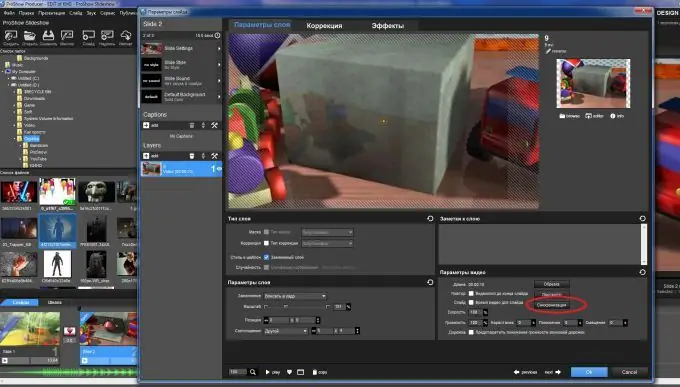
To synchronize the slides, so that the video “does not lag” and “does not speed up”, it is advisable to click the corresponding button. It's on the slide menu.
Step 6
To save the presentation, you need to click on the "Save" button.
Step 7
To display the film after editing, you need to click on the corresponding "Publish" button.


