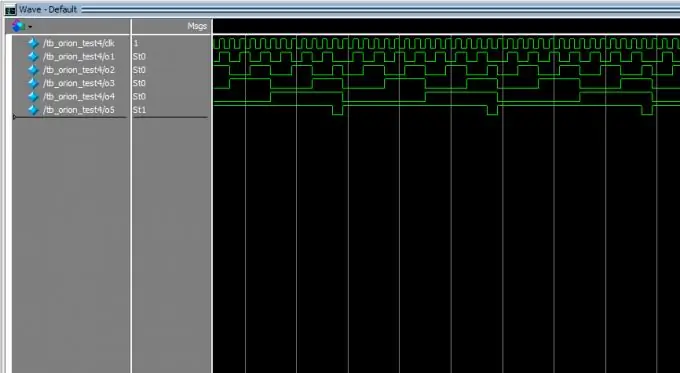
We write the testbench module and run the simulation in the ModelSim environment from Altera.
Necessary
- - computer;
- - installed development environment Quartus II + ModelSim.
Instructions
Step 1
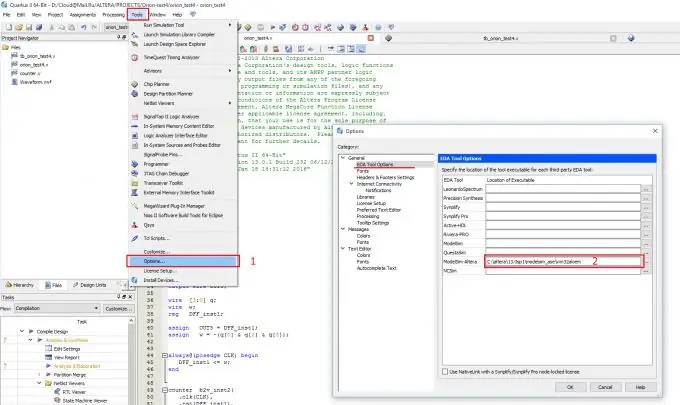
The first step is to make sure that the path to the ModelSim tool is specified in the Quartus II development environment. To do this, open the Tools -> Options menu. In the options, go to General -> EDA Tool options. We find the ModelSim-Altera field and type C: / altera / 13.0sp1 / modelsim_ase / win32aloem into it or, by clicking on the button with three dots, we look for this directory on our computer. Naturally, for a version of Quartus other than mine, you will have your own path to the "win32aloem" directory.
Step 2
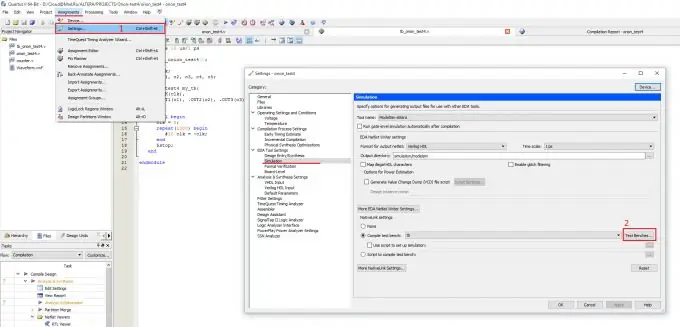
You have a project for an FPGA in Quartus II. How to write tests, or testbenches (testbench) - this is a topic for a separate article. For now, let's assume that your testbench has already been written. Now you need to tell the development environment which test you want to use when simulating. To do this, open the settings through the menu Assignements -> Settings … In the window that opens, in the EDA Tool Settings -> Simulation section, click the Test Benches … button Here, by the way, you can set several tests and switch to the required one when compiling the project.
Step 3
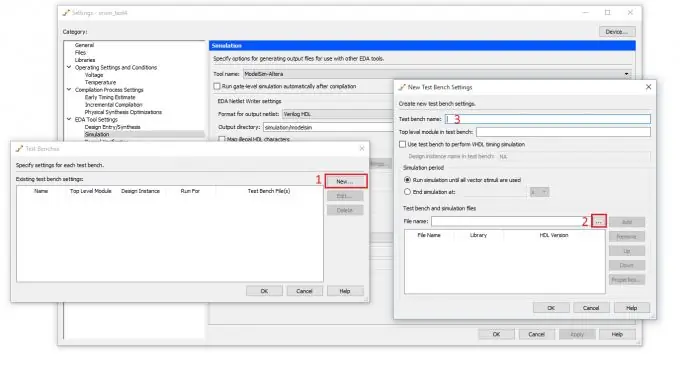
A window for editing tests has opened. We haven't created any test benches yet, so the list is empty. Press the New button … In the window that opens, you need to specify the test settings.
To the left of the field, click on the button with three dots. Select the file with the testbench code and click Open. Now click the Add button. The test appeared in the list of tests.
After that, in the field, set the name of the top-level module that is defined in your testbench. You can enter any name in the field, by default it will be automatically created the same as the name of the module.
That's it, we have set the basic test settings. Click OK twice. Now our test has appeared in the dropdown list of test benches. Click OK again.
Step 4
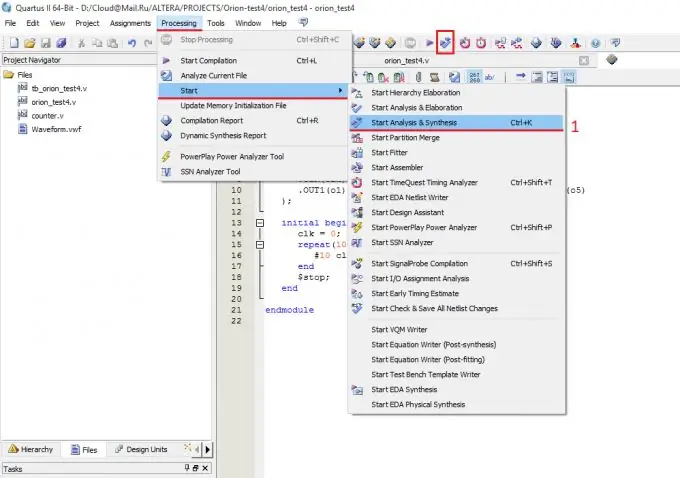
If you haven't done the synthesis of the project yet, then it's time to do it. Select Processing -> Start -> Start Analysis & Synthesis from the menu, or press the key combination Ctrl + K, or simply click the corresponding icon in the top panel.
Step 5
Simulation can be started. Select Tools -> Run Simulation Tool -> RTL Simulation from the menu (1) or click the RTL Simulation icon in the top panel (2).

Step 6
The ModelSim tool will start, which will execute all the instructions written in your testbench, and stop (if you specifically indicated this with the $ stop directive in the test code). The screen will display the level diagrams of the FPGA input and output signals that you described in your project.

