Shooting a video is not a problem today. You no longer need to spend money on complicated expensive video cameras. It is enough to purchase a miniature digital camera with a built-in video function, and you can shoot all the interesting life moments. One thing is depressing - the quality of the resulting film is not always up to the mark. But there is a way out - edit it in Photoshop (Photoshop CS3 or later is suitable for this purpose).

Instructions
Step 1
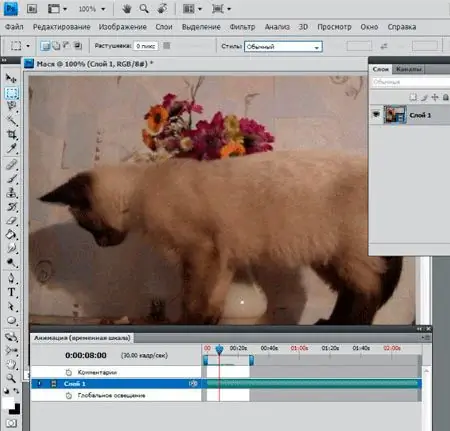
To open a file, go to the "File" - "Open" menu and specify the path to your file. The program reads most of the popular video files (AVI, MOV, MPEG …). The file will open. In the layers in the image, you will see a thumbnail of the tape, which is what the video file stands for.
Step 2
In order to start editing the video, go to the "Window" - "Animation" menu. The Animation editing window will open below the image. At the top of the window there is a timeline that shows the time of the video in seconds. If you want to make a small video for your site, reduce the length of the movie, just drag the end border and set the pointer to the duration you want. Now, when you press the "Play" button, the video will be played to the desired length (for example, 52 seconds) and start again.
Step 3
You can start editing. It is important to know that when performing operations using the buttons located on the "Tools" panel (brush, curing brush, stamp, painting, etc.), the changes will apply only to the frame with which you are working. In order for the changes to spread throughout the film, you need to go to the next frame and repeat everything. Then on the second, on the third…. The process is very time consuming. Suffice it to say that there are only 780 frames in a 52sec movie at 15fps.
Step 4
At the same time, adjustment layers (levels, curves, hue / saturation, etc.) are applied to the entire movie. So, if you adjust the colors in the frame, lighten it, add saturation, etc., these settings will be applied to all frames of the movie. In this way, it is easy to correct an excessively darkened film, apply a warm (or cold) photo filter, etc.
The actions using the layer mask also apply to the entire movie.
Step 5
Also, any filter set in the program can be applied to the entire movie. To make this possible, turn the file into a smart object. Go to layers, stand on the frame image and select "Convert to Smart Object" from the context menu.
You get the same result if you choose "Convert for Smart Filters" from the "Filter" menu. In the layers in the image, the ribbon thumbnail changes to a smart object thumbnail.
Act as you like and edit your video.
Step 6
Now the work is finished. Play the movie again, see the result. If all is well, it should be saved. To do this, go to the menu "File" - "Export" - "Watch video".
In the window that opens, fill in the necessary items: set the file name, location folder, format of the future video, its size (by frames). Then press the Render key.
Now the file is saved, you can put it in your family collection, on the website, send it to your friends by e-mail….


