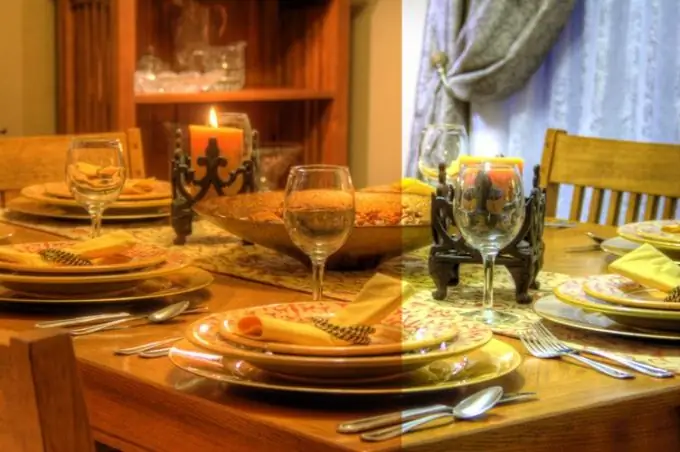
Pictures taken indoors with a camera with automatic white balance settings may have a noticeable yellow appearance. Photoshop filters allow you to return realistic colors to such an image.

Necessary
- - Photoshop program;
- - Photo.
Instructions
Step 1
Open the image to be processed in Photoshop and create an adjustment layer over the locked background image. To do this, use the Curves option in the New Adjustment Layer group of the Layer menu. Working with adjustments placed on a separate layer will allow you to always have a photo in its original form at hand and adjust the degree of filter application, if necessary.
Step 2
Turn on the right eyedropper in the filter settings and use this tool to select a white area by clicking on the object that should be white. In the same way, select the black color in the picture by selecting the left eyedropper. With the middle tool click on the gray area.
Step 3
To create an adjustment layer instead of Curves, you can use the Levels option of the New Adjustment Layer group. Color balance in Levels is adjusted by specifying white, black and gray points.
Step 4
If you're having trouble finding the areas you want, add a Threshold adjustment layer to your photo. This option can be found in the New Adjustment Layer group. With the Threshold Level set to one, start moving the knob to the right. As soon as a black dot appears on the image, turn on the Eyedropper tool and, holding down the Shift key, place a mark on it.
Step 5
To detect a white point, set the Threshold Level parameter to its maximum value and move the slider to the left until a white area appears. Mark the found area with the Eyedropper Tool.
Step 6
To detect the gray point, you need an additional layer filled with gray. Turn off the visibility of the Threshold adjustment layer and create a new transparent layer over the image. Fill it with a neutral gray using the Fill option of the Edit menu. Select 50% Gray from the drop-down list in the Contents pane. Blend the resulting layer with the photograph in Difference mode.
Step 7
Turn on the adjustment layer on which the Threshold filter lies and double-click on its thumbnail to open the settings. Set the Threshold Level to a minimum and move the slider to the right until a black point appears. This area of the image will be the desired area of gray color.
Step 8
Before adjusting the color balance using Curves or Levels, turn off the gray fill and Threshold filter layers.
Step 9
Save the photo with the edited colors using the Save As option of the File menu.


