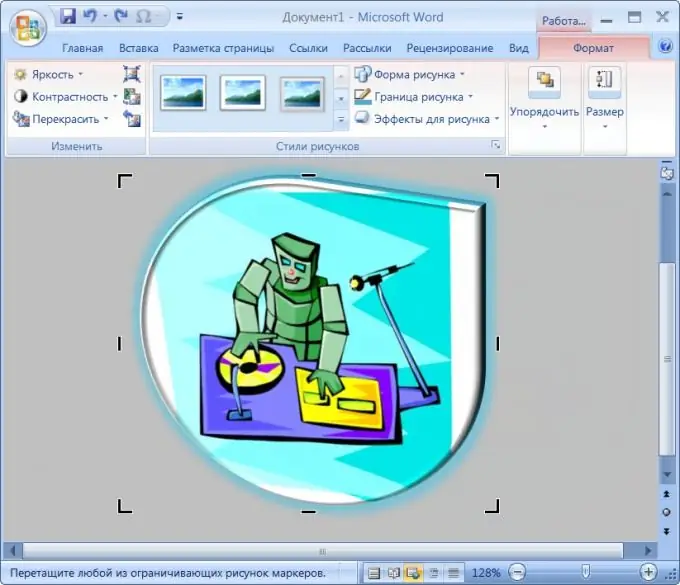
Creation and preparation of images for insertion into Word documents must be done in programs specially designed for working with images - graphic editors. After adding a picture to the document, you can "polish" the appearance of the illustration as an object inserted into the text - give it a shape, volume, surface texture, resize, etc. This can be done using the text editor itself - below are the corresponding instructions for the example of Microsoft Word 2007.

Necessary
word processor Microsoft Office Word 2007
Instructions
Step 1
Click the image you want to change in the body of the document. This will enable the "Picture Tools" mode, and another tab ("Format") will be added to the text editor menu - go to this new tab.
Step 2
Click the Crop button in the Size command group if you want to remove unwanted portions of the image from the edges. After that, the picture frame will change and by moving the corners and side lines of this frame, you can set new borders for the image.
Step 3
Change the values in the fields with icons indicating the width and height, if you need to resize the picture without maintaining the proportions. These fields are in the same Size command group, next to the Crop button. You can do without them if you drag the anchor points on the frame around the image with the left mouse button. If you need to enlarge or reduce the picture in accordance with the proportions, then you need to move these points while holding down the Shift key.
Step 4
Change the brightness and contrast of the picture, if necessary. To do this, there are drop-down lists placed in the "Change" command group, which are named so - "Brightness" and "Contrast". In addition to them, this group contains the "Recolor" command, which can make a picture one-color - for example, replace all colors with different shades of green or red. By clicking on this button, you can select the desired color shade from the drop-down list.
Step 5
Set the picture's dimensionality using the commands in the Picture Styles group. You can choose one of the ready-made options or design your own using the drop-down lists on the "Picture Shape", "Picture Borders" and "Picture Effects" buttons.


