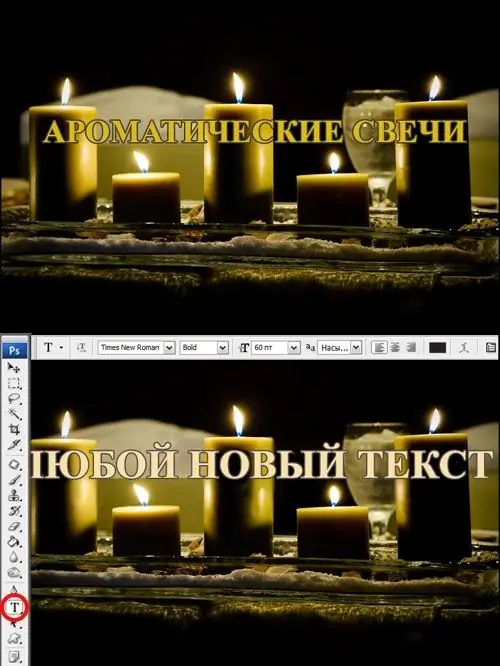
Unfortunately, the text that is placed on the photo in the form of a picture cannot be edited in the usual way - by analogy with a text editor. Therefore, if it becomes necessary to change it, for example, to replace it with another, consider it as a graphic object that needs to be removed from the photo in order to make room for a new one. Adobe Photoshop has a variety of tools and techniques for doing this.

It is necessary
Tools: Adobe Photoshop CS2 or higher
Instructions
Step 1
Open the original image.
Step 2
Paint over the text, masking it with the background. Use the Eyedropper tool to select a background color and paint over the image with the Brush tool. If the background is more or less uniform, such as greenery, sand, sky, and the like, you can apply larger strokes.
But the more colorful the background picture, the more carefully one should approach the work, painting over small areas - each in its own color or shade. Try not to overdo it: the more you paint over, the more you will have to reconstruct later.
Step 3
When the text-picture is painted over, select the tool called "Patch". They need to select a small fragment of the background, and then drag the selection that appears to the side. In this case, the selected space will be filled with the part of the background that you choose. You need to insert the patch very carefully, trying to choose the most suitable fragments. If the copied part fits well with the surroundings, it will make it easier for you to work later.
Step 4
There is no need to worry about the discrepancy between the contrast and brightness of the fragment to the environment - the program itself adjusts these parameters. Of course, there is no guarantee that the tones will match perfectly, but this is easy to deal with. Having selected a fragment, you need to select in the menu "Images" - "Brightness / Contrast", adjust the characteristics. Finishing can be done with the Clone Stamp tool, minor inaccuracies can be removed with the Spot Healing Brush tool. To work with complex backgrounds, you can also use the Finger, Pen, and other tools.
Step 5
If you try to do everything as neatly as possible, you will get a background cleaned of the old lettering, on which you can apply a new lettering. To do this, select the "Text" tool marked with the letter "T" on the palette. Click it within the image and type new text. Parameters can be changed on the top bar bar. As in a regular text editor, here you can select the font type, font type, size, color, and so on.


