In the latest version of its flagship product, Windows 7, Microsoft has developed new technologies for finding files and folders on hard drives. For fast searches in this environment, constant file indexing is used. The result was "on the face". Search has indeed begun to perform queries and find keywords much faster than in previous versions of Windows operating systems. But the constant indexing of files leads to "freezing" of processes on weak computer solutions. Therefore, disabling the search service in the operating system can increase the speed of the entire computer.

Necessary
Change Windows component settings
Instructions
Step 1
If you are not satisfied with the standard search engine solution of the operating system, then you can opt out of it by installing third-party software. For example, in the Total Commander program, the search quite quickly finds the necessary files and folders.

Step 2
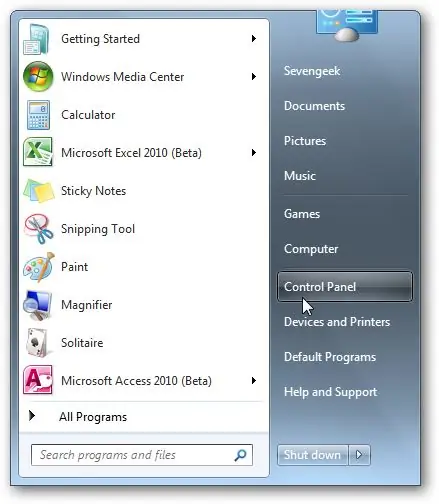
In order to disable the built-in Windows Search service, you must click the "Start" menu - select "Control Panel" (Control Panel).
Step 3
In the window that opens, select "Large icons", then click "Programs and Features" (Programs and Features).

Step 4
In the left pane of this window, click Turn Windows features on or off.

Step 5
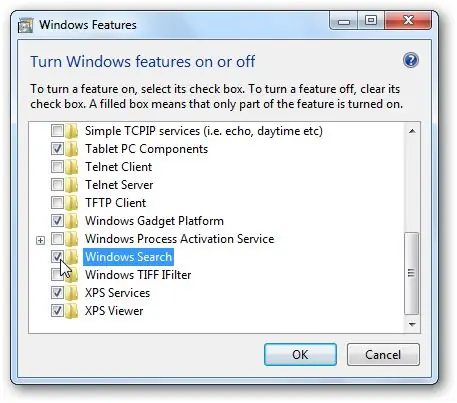
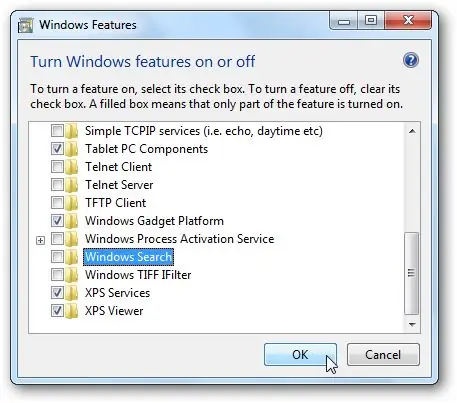
In the list that opens, find the Windows Search item and uncheck the checkbox.

Step 6
A dialog box will appear in which you must click "Yes" (Yes).

Step 7
You will see the Windows Components window again. Click OK.

Step 8
In a new window, you can watch the process of disabling Windows Search. The running strip will show the progress of the trip.

Step 9
As soon as the bar is filled with color, a window will appear that will inform you about the need to reboot, otherwise the changes will not take effect.

Step 10
Once the operating system has loaded, click the Start menu and make sure that the Windows Search service has become inactive.

Step 11
If you launch any explorer window, you may notice that the search also disappeared.


