Decorative cosmetics were invented so that ladies could safely argue with nature, correcting the shortcomings of a woman's appearance. Adobe Photoshop copes with this task just as well - lovers of this program can apply makeup like real makeup artists.
Instructions
Step 1
Open the photo you are going to work on in the editor and duplicate it using the Ctrl + J keys. For each change, a new layer will be created so as not to spoil the main image with an unsuccessful correction. See what needs improvement. In this case, the whites of the eyes are reddish, which gives the girl an unhealthy tired look. Press Q to invoke Quick Mask Edit Mode. Prior to CS3, two buttons on the toolbar were responsible for working in this mode: "Editing in quick mask mode" and "Standard mode". In newer versions, there is only one button left.
Step 2
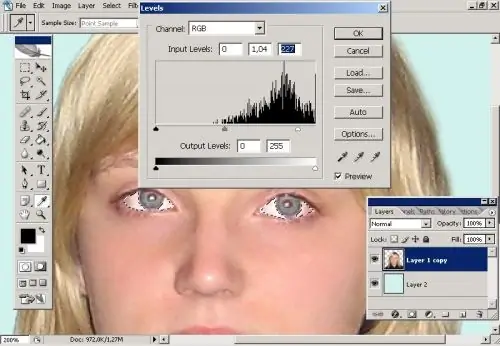
Press D to set default colors. Choose a hard brush with a small diameter and paint over the whites of the eyes without touching the iris and the inner side of the eyelids. If you did accidentally paint over the extra area, change the foreground color to white and paint over this area with a brush. Press Q again to enter standard mode. The red film was replaced by a highlight. Press Shift + Ctrl + I to select the whites of the eyes, and choose Levels from the Adjustments section of the Image menu. Move the sliders to lighten this area to an acceptable level.
Step 3
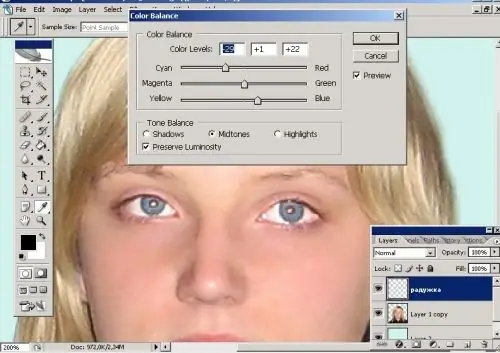
Now with the help of a quick mask select the irises and copy the selection to a new layer with Ctrl + J. In the Adjustments group open Color Balance. Move the sliders to brighten the eye color.
Step 4
Go back to the main layer and select the eyebrows - you need to darken them. Transfer the copy to a new layer again. Hold down the Alt key and click the Add Layer Mask button at the bottom of the Layers panel. Choose a small, soft, white brush. Set the Blending Mode for this layer to Myltiplay ("Multiplication") and Opacity ("Opacity") about 20%. Brush your brows several times until you are satisfied with the result. Press Ctrl + E to merge the layers.
Step 5
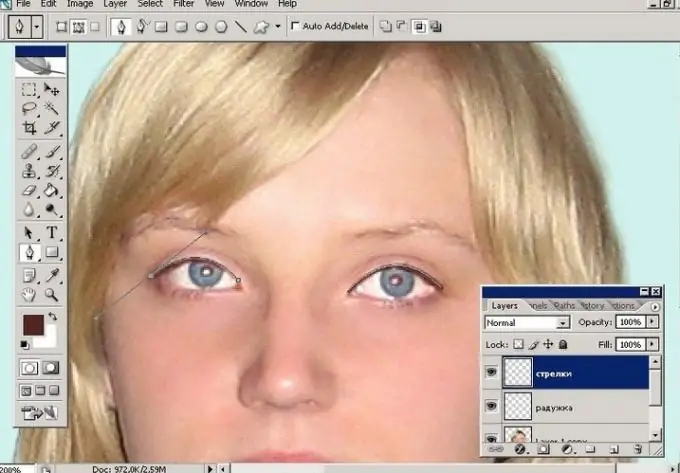
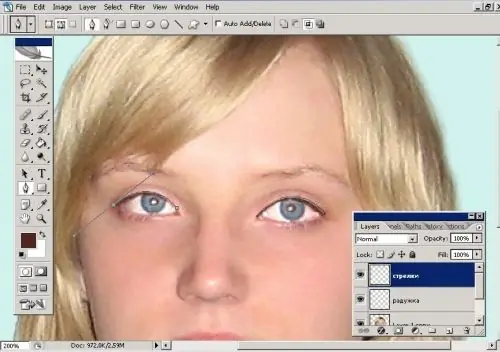
Now you will need to stroke around the eyes. Set the foreground color to dark brown, navy blue or black, depending on the model's hair or eye color. Then select the Brush tool and set its values: hardness = 100%, diameter 2 pixels. Select the Pen Tool from the toolbar. Use it to create alternate strokes for the upper eyelids above the lash line. Right click on the stroke and select Stroke Path from the drop-down menu, then Delete Path. For the lower eyelids, the diameter can be reduced to 1 pixel. If the line is rough, use the Erase Tool with low opacity and pressure.
Step 6
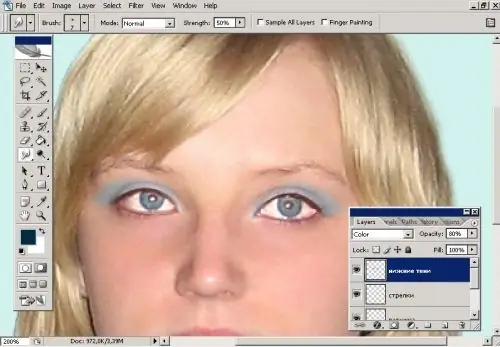
On the main layer using a quick mask, select the upper eyelids and copy them to a new layer with Ctrl + J. Decide which shadow color you will paint on the model and set it to the foreground color. In this example, it is 4c545b. Change the parameters of the tool Brash Tool ("Brush"): hardness = 0%, diameter 10 px. Using the Pen Tool draw a line of shadows. Set the blending mode to Color ("Color"), transparency 80%. Use the tools in the R group ("Blur") to blend the shadows.
Step 7
Duplicate this layer. Now you need to apply shadows of a lighter shade under the eyebrow line. In this case, the color f7afa0 is used. With the Pen Tool draw a line of the new color over the darker shadows. Blending mode Soft Light, opacity 80%. Use the blur tools to make final adjustments to the blending intensity.


