Most personal computers today have more than one hard drive. And each separate disk, as a rule, is divided into several partitions. In this regard, the operation of changing a drive letter or partition is not so rare.

Instructions
Step 1
To be able to change the drive letter or partition letter, you must have sufficient rights, so the first step in the procedure must be to log in with administrator rights.
Step 2
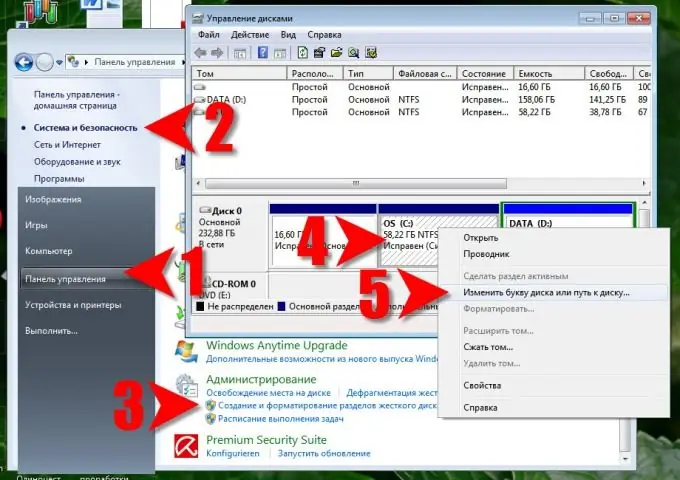
Open the menu on the "Start" button and select the "Control Panel" command.
Step 3
The steps to follow in Windows 7 and Vista are slightly different from Windows XP. In Windows 7 and Vista, in Control Panel, click the System and Security link, and then in the Administrative Tools section, click the Create and Format Hard Disk Partitions link. Windows XP: In Control Panel, click the Performance and Maintenance link and then the Administrative Tools link. In the administration panel, double-click Computer Management. Then, under Storage, click Disk Management. The following steps are almost the same in Windows 7, Vista, and XP.
Step 4
In the window titled Disk Management, right-click the disk or partition that you want to change the letter of and select Change Drive Letter or Drive Path.
Step 5
In the window that opens, click the "Change" button. In the next window, select the desired letter from the drop-down list opposite the "Assign drive letter (A-Z)" inscription.
Step 6
The OS will ask you to confirm the change of the letter - press the "Yes" button.
Step 7
Close both windows by clicking "OK". As a result, the letter of the selected drive or partition will change.


