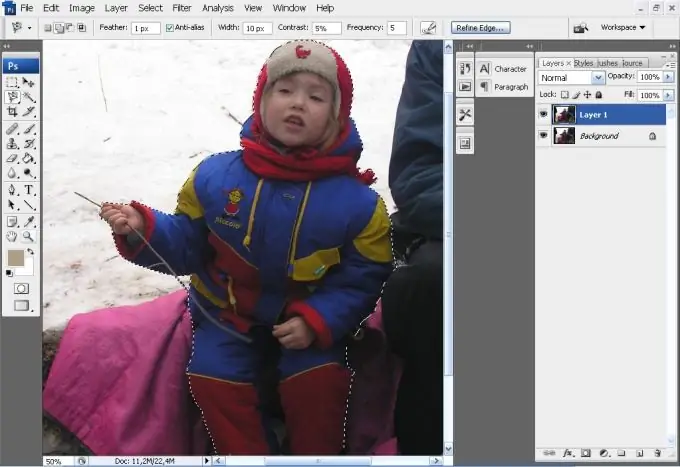
To insert a human shape into a collage, it must be cut from the original image. Adobe Photoshop offers a whole set of tools for selecting fragments and areas, but not all of them are suitable for working with objects of complex shapes.

Instructions
Step 1
Open the photo. On the toolbar, select the Magnetic Lasso Tool ("Magnetic Lasso"), click on the silhouette of a person and draw around it. You can customize the tool's parameters on the property bar. In the Width field, specify the width of the area that the program should analyze to distinguish the object from the background. Feather defines the blur radius of the selection in pixels. Where the shape blends into the background, click on the silhouette to make it easier for the tool. Double click to close the selection.
Step 2
In the CS3 version there was an additional option for setting the selection - Refine Edges ("Improve edges"). At the bottom of the dialog box there are 5 buttons for showing the selected area. On White is active by default - the fragment is visible on a white background. On the left is the On Black button. Use these modes to find defects in the selection of dark and light areas. To correct errors, change the values of the parameters Radius, Contrast, Smooth, Feather, Contract / Expand, moving the sliders.
Step 3
You can use the Edit in Quick Mask Mode tool to select complex areas. Press D on your keyboard to set the default colors. Select the Brush Tool, set the hardness to 100% and start painting over the human shape. If you grabbed the background around the shape, swap the black and white colors and use the same brush to remove the mask. To return to normal mode, in CS3 press Edit in Quick Mask Mode again, in older versions press the adjacent button. The background around the shape is now selected. To select a person, from the main menu, choose Select and Inverse.
Step 4
If you need to remove a person from a photo, use the Ctrl + X combination, if you just copy to another image, use Ctrl + V.


