When processing photos on a computer, for example, preparing them for posting on a website, the user often has to resize them. The quality of the photo is reduced, but this reduction can be made as small as possible.

Instructions
Step 1
You cannot reduce the size of a photo without losing quality. However, you can choose the option to reduce the size in which the loss in quality will be acceptable. If you are reducing photos for the Internet, you can use the programs described below for this.
Step 2
The easiest way to resize is in Microsoft Office Picture Manager. If you have Microsoft Office software installed, just right-click the photo and select "Open With - Microsoft Office Picture Manager". In the menu of the program that opens, select: "Picture - Resize", set the desired size, click "OK" and save the changes. The quality of photos reduced by this method is quite suitable for their publication on the Internet, while the process of reduction itself takes a few seconds.
Step 3
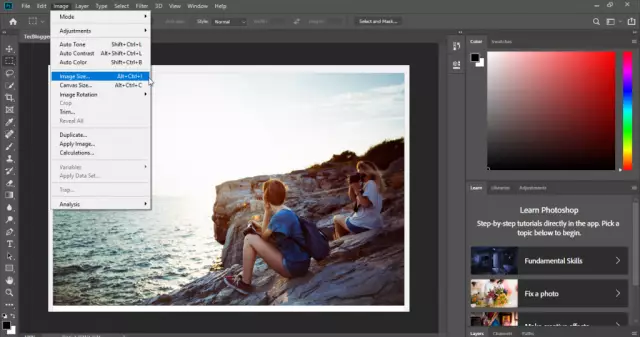
Use Photoshop to reduce the size of your photos. Run the program, open the photo you need - "File - Open". Then choose from the menu: "Image - Image size", enter the dimensions you need and click "OK". Please note that if you reduce the photo several times, then for minimal loss of quality, it is better to carry out this operation several times, reducing the photo by 50% and removing noise after each reduction in size. To remove noise, use the "Filter - Noise - Remove Noise" option.
Step 4
If you are preparing a photo for the Internet, then after obtaining the desired size, additionally open: "File - Save for Web". Choose an image format - for example, JPEG high. The new size of the photo will be indicated in the lower left corner of the photo. If it is large, select a different saving quality - for example, JPEG Low. Then click "Save", specify a file name and click "OK".
Step 5
Good quality thumbnails can be obtained using BenVista PhotoZoom. Its trial version can be downloaded here:


