Internet users often face the problem of the impossibility of uploading photos to some sites or to their pages on social networks due to restrictions on the size and weight of the file. You can reduce the photo in any image hosting, for this you just need to specify the desired size. But the image quality is always lost in this case. The photo is blurry and blurry. It is better to manually reduce the size of photos to maintain their quality.
Necessary
computer, Photoshop
Instructions
Step 1
Open the image you want to reduce in Photoshop. From the File menu, select Open and locate the desired image in the folder.
Step 2
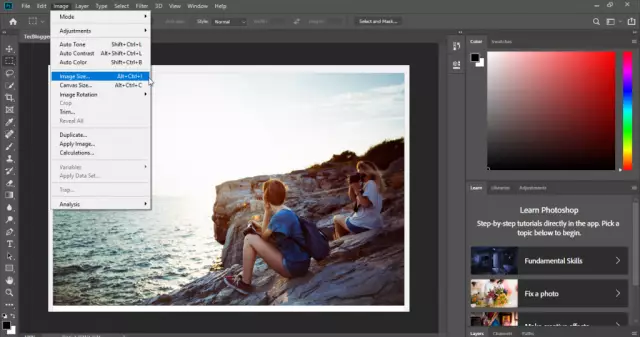
The size of this photograph is 1024x798 pixels. If you immediately reduce its size to 300 pixels, then the image will be fuzzy and blurry. So first reduce the size by 50%. To do this, select the Image Size command from the Image menu and set the width and height of the image as a percentage in the pop-up window.
Step 3
The photo was reduced in half, but became blurry. From the Filter menu, select Sharpen and click on Sharpen More. The image will immediately become clearer.
Step 4
To prevent the photo from losing color, you can make it richer. To do this, in the Image menu, call the Adjustment command and select Saturation. Move the Saturation slider to the right to a value of 15.
Step 5
Now scale down the image to 300px. Select the Sharpen command again, but this time click on the Unsharp Mask tab. In the pop-up window, set the Amount slider (effect) to parameter 60. You can set your own numbers, see how the image changes and choose the option that suits you.
Step 6
It remains to save the image. To do this, choose Save for Web from the File menu. The image will open in a dialog box. Select the jpeg file type, Quality (quality) in the range of 50-68 and check the box in the option Optimized (optimization). Save the image in the selected folder.


