Do you want to make yourself a beautiful avatar, or edit a photo for your blog, but do not know how to reduce the picture without losing quality? In this case, you should turn to image editors. There are several custom imaging programs in which you can reduce the picture without degrading its quality. The most famous are IrfanView, Paint, Adobe Photoshop. Photoshop is the most suitable for solving this problem.

Necessary
- 1. The original picture is of sufficient size.
- 2. Adobe Photoshop program.
Instructions
Step 1
Open the image in Adobe Photoshop, in the "File" menu, clicking the "Open" button, select your image.
Step 2
Before you reduce the picture, you need to edit it using the "Sharpen" filter. Select the "Filter" menu, there hover over "Sharpen" and click on "Sharpen" again.
Step 3
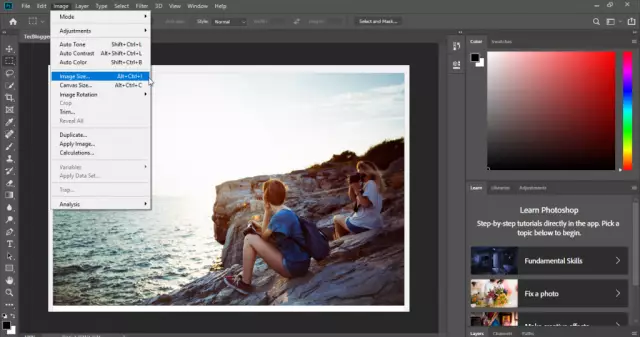
Let's say you need to reduce the size of an image to 200 pixels wide. In order not to lose quality, you first need to halve it (50%). In the "Image" menu, click on the "Image size" button, then in the field that appears in the line with the name "Width" select "percent", and set the percentage to 50 and click "OK". As a result, we got a picture with a size of, say, 300x400 pixels.
Step 4
Now edit the image again with the "Sharpen" filter in the same way as before. After that, we need to reduce the size to the one we need (200 pixels) by opening the menu "Image" - "Image size" again. In the "Width" line, select the "pixels" item and set the size to 200.
Step 5
The last step is to use the "Unsharp Mask" filter to sharpen the photo. To do this, open the "Filter" context menu, select "Sharpen" and click on "Unsharp Mask". In the window that appears, you need to set values for three parameters - "Amount", "Radius" and "Threshold". "Amount" means "power", the higher the value, the stronger the definition (try 50% first). "Radius" defines the area of increasing contrast (set 1.0), and "Threshold" keeps track of the difference between "adjacent" pixels (set 0).
Step 6
It remains only to save the result. Click the "File" button in the main menu and select "Save As". Write the name of the file, and select from the list of the presented formats to save the one you need (the most versatile is JPEG).


