It is often necessary to insert an image into a text document. Not all text editors can do this. For example, in a simple editor "Notepad" this function is not provided. But in the editor Microsoft Office Word, you can not only insert a picture, but also edit it.

Inserting an image into a text document
First you need to open the Microsoft Office Word editor. Then open the document in which you want to insert the image. Then you need to find the desired picture on the computer, right-click on it. Select the "View" action. The image will open in an image viewer.
Next, you need to right-click on the picture. From the list of actions that appears, select the "Copy" item. In the Word document, specify the location where you want to insert the image. Right-click on the desired location and select the "Paste" action. The image will appear in the document.
You can insert an image in another way. In the "Insert" tab of the Word editor, click on the "Picture" button, then specify the path where the required image is located. After finding the image, select it and click on "Insert".
Editing a picture in a text editor
An image inserted into a text editor may turn out to be too large, or, conversely, small. In this case, you can use the image editing function built into the Word editor.
To increase or decrease the size of the picture, you need to click on the picture with the left mouse button. Then pull it by the edges. The picture can be made a little narrower or wider than before, that is, you can change the proportions.
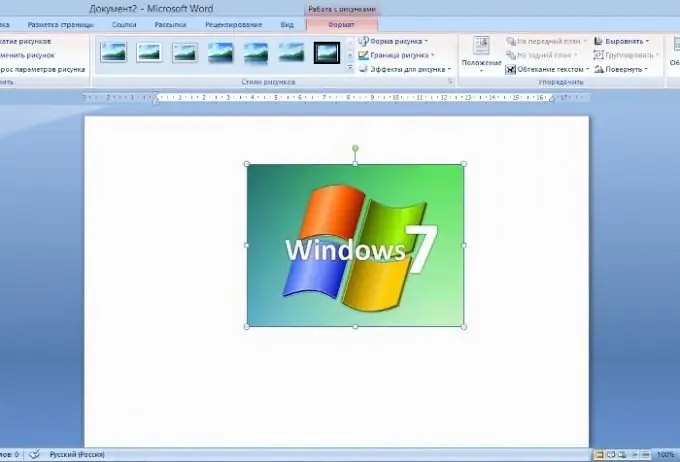
If the image is cloudy, you can make it brighter and more contrasty. To do this, go to the "Format" menu, which is located under the inscription at the top "Working with pictures". Here you can add or subtract contrast and brightness, recolor the image. You can also use compression if needed.
You can also choose a style for the picture from the Format menu. The drawing can be done with rounded corners or curves, oval or framed.
You can select any of the shapes shown in the Picture Shape submenu as the picture shape. Note that when you select some of the shapes, the drawing will appear cropped.
In the submenu "Picture Border" you can add an outline and set its thickness and color. The outline looks the same as the frame. You can add Drop Shadow, Reflection, Glow, Smoothing, and Emboss effects. There is also the effect of rotating the volumetric shape. Ready-made blanks for the picture are also available.
The choice of the position of the image in the document is available in the "Position" submenu. The position can still be changed by moving the picture using the Enter, Backspace and Spacebar keys.
In the Picture Tools window, you can also move the image to front and back, rotate by degrees, and align. You can also crop unwanted portions of the image using the Crop tool. The size can be changed by opening the "Size" window from the corresponding submenu.


