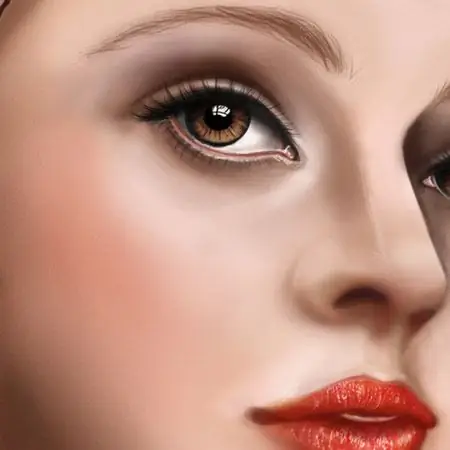
A beautiful and original female portrait can be drawn not only with paints and pencils on paper, but also by means of computer graphics. Having installed Photoshop, as well as a tablet and a pen, you can master the technique of drawing portraits on a computer, and create spectacular and beautiful images, approaching the level of modern graphic masters.

Instructions
Step 1
First, create a new document in Photoshop and use a tablet to make a sketch - draw the main lines and outlines of the future portrait on a white background, outline the location of facial features, create a silhouette of a hairstyle with thin lines. When the sketch is ready, create a palette of colors for painting the skin.
Step 2
Create a separate layer and select a few primary colors with which you will paint over the skin - the main tone, and then a couple of lighter and darker transition tones. Subsequently, you do not have to select colors while drawing - it will be enough to go to the layer with the palette and use the eyedropper to select the desired shade.
Step 3
Paint over all of the skin in the portrait with a neutral base color to create a foundation, and then paint the shadows with a darker shade. Pick a pale pink color for the lips and sketch out their outlines. In lighter shades of beige, mark the areas of the face that are hit by light, and then outline the shaded areas and cheekbones in more detail.
Step 4
Using a Basic Brush with Shape Dynamics and 70% Opacity, 2-4 px thick, paint the eyebrows, directing the hairs to one side. Make the tips of the eyebrows thin and elongated using different levels of pressure on the pen on the tablet.
Step 5
Paint over the eyes with basic colors, darkening the edges slightly, and making the center of the eyeball a little lighter. Shade the upper eyelid and also add a small shadow to the lower eyelid. Lighten the iris by drawing a black pupil on the basic tone of the eye and taking many thin rays away from it.
Step 6
Make the iris volumetric by painting these rays with a brush of different thicknesses. Add a light spot around the inner corner of the eye, and then draw pink dots in the corners of the eye. On a new layer paint the lashes with a dark thin brush with 60% opacity. Using the Dodge Tool and Burn Tool, brighten and darken some parts of the eyes, making them deeper and more lively.
Step 7
After the eyes, draw the lips - draw shadows in the corners over the main color, as well as spots of light. Draw curved lines that form the outline of the lips, and use a thin, scattered brush to paint the texture of the lips. Apply a small area of light to the upper lip, and then create an adjustment layer with levels (New Adjustment layer> Levels) and correct the main tone of the picture.
Step 8
Merge the layers and create a copy of the created layer. Add some noise by choosing Add Noise from the filter menu and setting the value to 7-9%, and then erase noise from all areas of the picture except the skin. Texture the skin using the main transition colors from the palette, and then paint the hair.
Step 9
To begin with, create a general volume of the hair by marking the areas of darker and lighter colors inside the outline, and then draw strands in the areas of the sliding color. Where the light doesn't shine on the hair, darken it. Create a background for the portrait.


