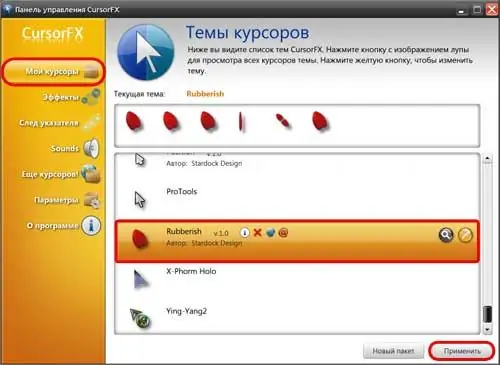
Although the cursor occupies a small area of the screen, the cursor matters a lot. This is not just an icon - it is an extension of your hand, and the connection of the physical world with the virtual one. Therefore, it is not surprising that many people want to change the cursor to a more attractive and personalized one. In Microsoft Windows, this can be done either using the tools built into the system, or using additional software.

Necessary
Tools: Standard Microsoft Windows Tools or Stardock Cursor FX
Instructions
Step 1
Microsoft Windows has built-in capabilities that allow you to change the mouse cursor. To access them, select "Settings" from the "Start" menu and then go to "Control Panel". Find the "Mouse" icon and open it with two clicks.
Step 2
Following this, a window will open allowing you to configure and change some parameters of the mouse, such as movement speed, button inversion or wheel parameters. You can change the cursor on the "Pointers" tab. Go to this tab.
Step 3
There are two possibilities: you can either change each cursor in the diagram individually, or the entire diagram at once. To replace the entire scheme, expand the list of ready-made schemes, select the appropriate one and click "OK" to accept the changes.
Step 4
If you want to change a particular cursor from the scheme, for example, the waiting hourglass icon, select it with the mouse from the list of cursors, click the Browse button, find a suitable replacement and click Open.
Click OK to make the new cursor active.
Step 5
The pointers that ship with Windows are not varied or sophisticated. If you want something special, then use the additional software.
For example, install the Cursor FX software from Stardock. This program allows you to change the cursor with a few clicks. Just open the program, select the cursor you like from the list, and click "Apply".


