If you have your own local network, it is often necessary to delimit access to the folder containing important files, while allowing only a certain user to see them. So, for example, the folder "Reports" can include accountants and bosses, but no one else. It sounds simple, but in order to differentiate access to folders, you will need accuracy and thoughtfulness when performing the following steps.

Instructions
Step 1
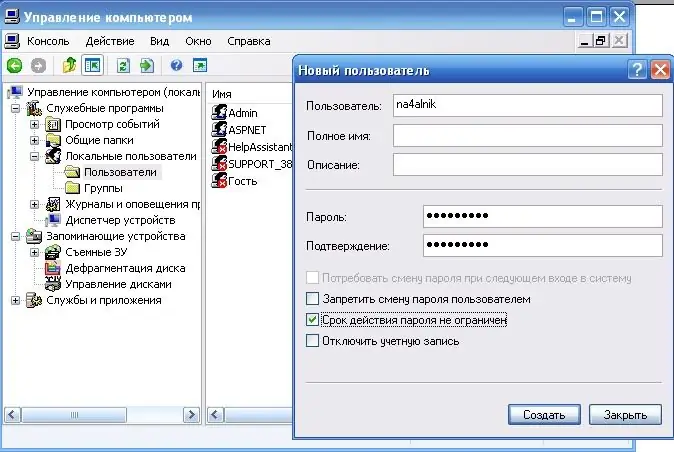
The first step is to create the user to whom you want to give access to the folder. To do this, click on "My Computer" with the right key, and, in the context menu that opens, select "Management". The Computer Management window opens. On the left side of it, in the "Utilities" section, select the "Local Users" folder. On the right, select "Users".
Step 2
In the menu in the window header, select "Action" and "New user". A dialog box will appear where you need to create a login and password for the user to whom we want to give access, click "OK". Now we can close all windows.

Step 3
On the folder that we will open for viewing on the network, right-click, select "Properties". In the window that opens, go to the "Access" tab. We select the item "Share this folder". Below we press the button "Permissions".
Step 4
In the window that opens, we see that "Everyone" can get access to the folder, while if you look closely at the bottom, you can see that they can only view the information. Select the "All" line and delete it. Then you need to add those users to whom we open access to the folder. Click "Add"
Step 5
In the window that opens, click the "Advanced" button, then click "Search". At the bottom of the window, you need to find the name of the desired user, and select it. Click "OK", then "OK" again to close the two open windows.
Step 6
If you want this user to have the rights not only to view the contents of the folder, but also to add your files there, then at the bottom of the window you must check the box next to "Full access" in the "Allow" column. Click "OK" in all the remaining windows. Access to the folder of one user is allowed, while other users will not be able to view the contents of the folder over the network. So you can differentiate access to folders not only to individual users, but also to user groups.


