The Windows operating system has a fairly wide range of things that you can customize to your liking. This applies to panels, buttons, folder views and, of course, the desktop theme. If you are tired of the picture, you can replace it with your own - the original one. For example, one created from a photograph. To make a theme from a photo, use the following guidelines.

Instructions
Step 1
To make a desktop theme from a photo, first save the photo to your computer. To do this, use any methods and means available to you (for example, save the photo to a memory card, use a USB adapter to transfer the image to your computer's hard drive).
Step 2
Open the photo in a graphics editor. Modify the image, retouch, apply interesting effects, in general, make an image out of the photo that you want to admire when working with a computer. Pay special attention to the size of the image.
Step 3
From any free space on the desktop, open the desktop properties window. To do this, right-click on the desktop, select the last line "Properties" in the drop-down menu. Go to the "Options" tab and see what resolution the screen has at the moment. Ideally, your photo should be the same size.
Step 4
Save the finished image to the hard disk of your computer. Remember which directory you saved it to. A little later you will have to specify the path to the file.
Step 5
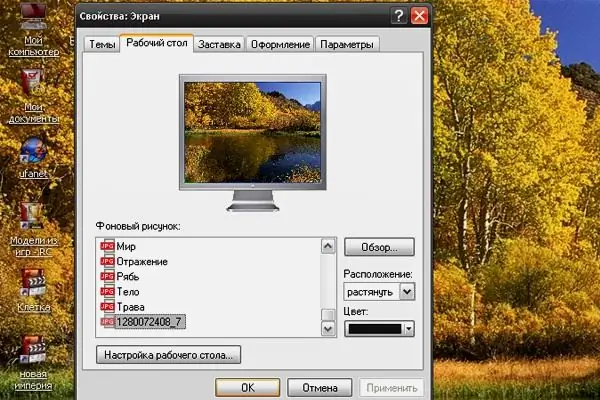
Call the "Property: Screen" window again. Go to the "Desktop" tab. The top part of the window displays the desktop theme that you currently have installed. Below are the available themes and operating buttons.
Step 6
Click on the "Browse" button and, moving through the catalog, select the image you just saved. Click on it with the left mouse button, the image at the top of the window will automatically change to the one you just selected.
Step 7
From the drop-down menu under the Browse button, choose how your image is displayed on the desktop. It can be centered, look like a continuous row of duplicate photos, or stretch across the entire desktop area.
Step 8
Having decided on the location, click the "Apply" button and close the screen properties window by clicking the left mouse button on the "OK" button or clicking on the "X" icon in the upper right corner of the window. Enjoy the theme you created.


