When working at a computer (laptop) in text editors for a long time, your eyes are under great strain. They get tired of looking directly at the screen. Eye fatigue occurs when reading low-resolution text. To relieve the eyes of a lot of stress, you need to pause in your work, and also turn on the anti-aliasing effect of the fonts. As a rule, most operating systems have this feature.

Necessary
ClearType Tuner PowerToy software
Instructions
Step 1
A simple solution to the problem is to enable the "Clear Type" font smoothing mode. This mode is included with the operating system. To launch it, right-click on the desktop - select "Properties" - "Appearance" tab - click "Effects". Check the box next to "Use the following anti-aliasing method for screen fonts" - select "Clear Type". Click OK.

Step 2
If you do not like this anti-aliasing mode (too strong or a little anti-aliasing), then you can use another technical solution from Microsoft - "ClearType Tuner PowerToy". This software is a subtle font smoothing tweak tool. The program is very easy to operate and does not require additional knowledge, despite the program's English-language interface.
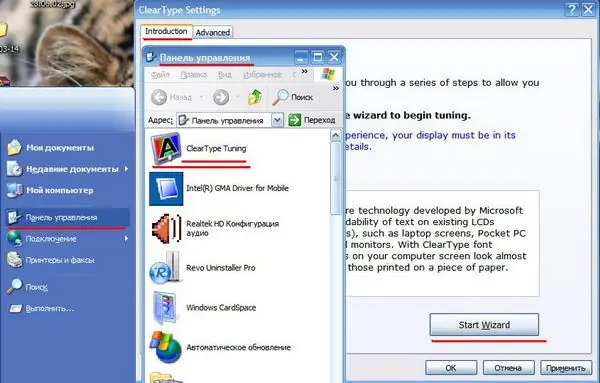
After installing the program. In order to launch it, you need to go to the "Control Panel", which is located in the "Start" menu. Launch the "ClearType Tuning" shortcut. In the window that opens, click on the "Start Wizard" button.

Step 3
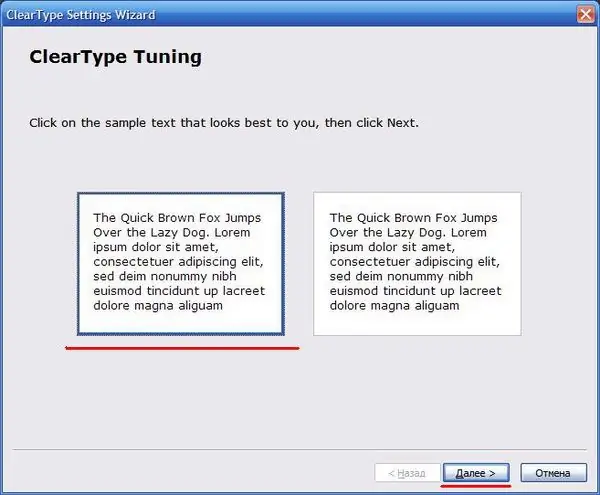
Two windows with the same text will appear in this window, you will see the differences between these texts. Choose one option that looks the most readable to you. Click "Next".

Step 4
Then another 6 windows will appear. Here you also need to choose the best option and click the "Next" button. After that, click the "Finish" button.


