Almost all images in electronic form are in raster format, i.e. broken into individual pixels. The quality of such a picture will depend on the number of pixels per unit of length. Vector images are a picture made up of individual elements.

Necessary
skills in Adobe Photoshop
Instructions
Step 1
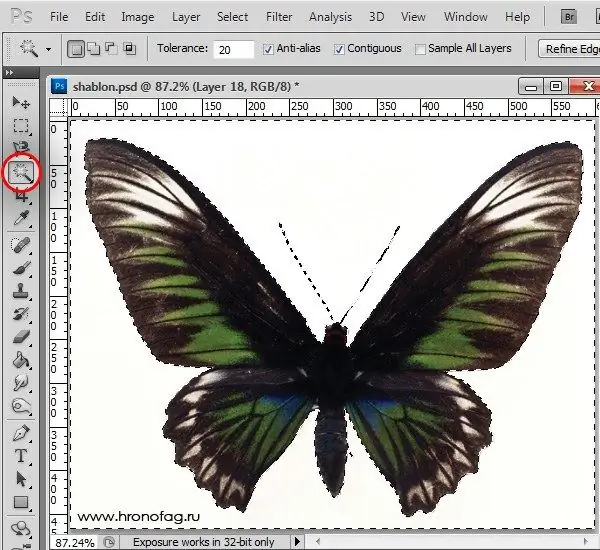
Launch the Adobe Photoshop program, using the "File" - "Open" command, add the desired image to the program, which you want to change from a raster to a vector. Or just drag it to the application window. Select the Magic Wand tool from the Tools palette, select the white background around the image, right-click and choose the Invert Selection option.
Step 2
Select the Lasso or Magnetic Lasso tool. Right-click on the selection and select the Make Work Path option to convert the image from raster to vector. In the window that opens, set the degree of smoothing to your liking. The Path palette will appear on the screen.
Step 3
Select with the Path Selection Tool the outline of the object, then select the Layer menu, select the New Fill Layer option and click on the Color command. Thus, you have created a fill layer, it was immediately assigned a vector mask in the form of an image outline.
Step 4
Complicate the drawing, for this take the Pencil tool, select the mask of the fill layer. Set the Subtract option in the pencil settings and add the elements of the picture. Save the resulting vector image.
Step 5
Add the image to Adobe Photoshop for raster-to-vector conversion. Double click on the background layer to make it a working layer. Duplicate the layer. Select the Eyedropper tool, click on the darkest color in the image. Next, take the Pen tool and use it to add anchor points to the image.
Step 6
In the Pen toolset, select the Point Conversion Tool, select the second layer, and draw a path around the image. Make a copy of the layer and similarly draw the outline of the image with a different color that dominates the picture. Draw the details of the image in the same way, each on a new layer. Save the result.


