Laptops and netbooks have built-in webcams. It is logical to assume that if the device is capable of capturing and broadcasting video, it will be able to take a photo as well. Many external webcam models even have a dedicated button for this purpose. There is no such button on the laptop camera. So how do you turn it on to take a photo?

Instructions
Step 1
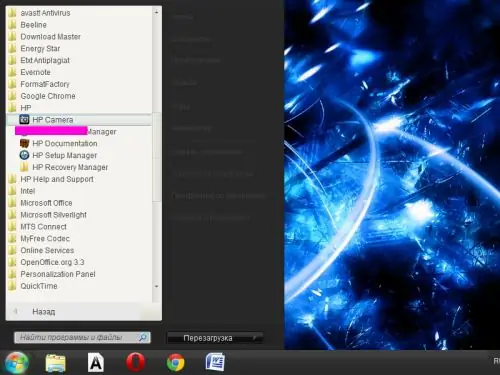
Use the program "native" for the laptop camera to take a photo - it must be supplied with the computer when you buy it. For example, for HP laptops, such a program is HP Camera (Start menu - All Programs - HP - HP Camera).
Step 2
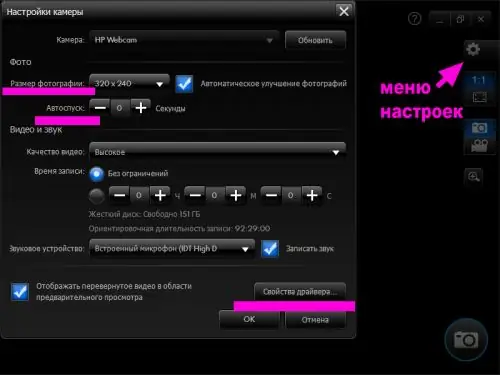
Set the photo size, self-timer options in the settings menu of the HP Camera software (the button with the painted gear). For finer image quality settings - brightness, contrast, saturation, etc. - use the "Driver Properties" button.
Step 3
Select the camera icon in the shooting mode selection menu on the right (the camcorder icon turns on video mode). To take a photo without a self-timer, click on the round button in the lower right corner of the program window. The resulting photo in Windows 7 will be saved in the "Pictures" library.

Step 4
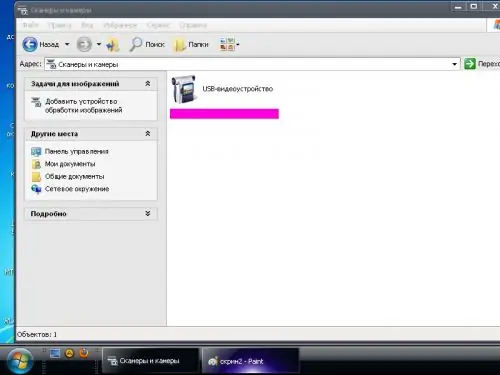
Use standard Windows operating system tools to take a snapshot (in the example, we used Windows XP). Make the transition: menu "Start" - "Control Panel" - "Scanners and Cameras". Select the built-in camera from the list of available devices. The system may recognize it as a USB device, do not be alarmed by this.
Step 5
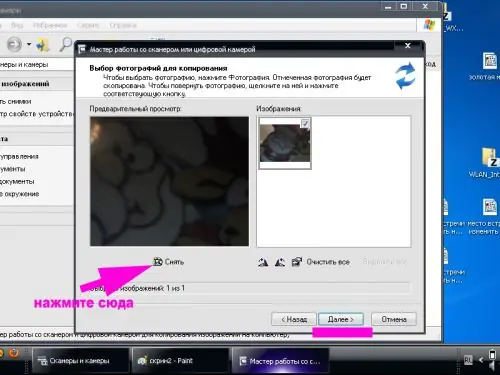
In the window that opens, click on the "Capture" button located under the camera's viewfinder. The captured photo is displayed in the window to the right of the viewfinder. Select it and click on the "Next" button.
Step 6
Enter the name of the picture in the window that opens and select the path to save it - the photo is ready. Similarly, you can take a photo through the interface of the "My Pictures" folder and the menu of the standard graphics editor Paint.
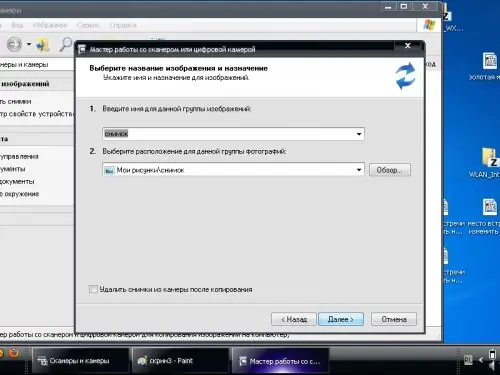
Step 7
Open the My Pictures folder or Paint editor (Start menu - All Programs - Accessories - Paint). Select "Receive from Camera or Scanner" from the menu. Then proceed in accordance with the instructions described above. A photo taken with the Paint tool can be edited immediately.
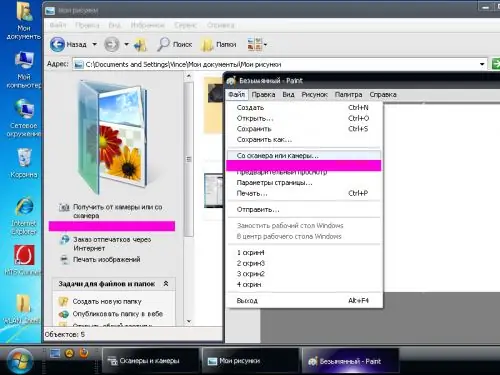
Step 8
Use third-party webcam software to take snapshots, which are widely distributed on the Internet for free and for a fee. For example, the free Live WebCam program
Step 9
Launch Live WebCam and take a photo by clicking the “Take Photo” button, or set the options for automatic capture. For a detailed guide on setting up and working with the program, see the program's website (the link is given above).


