A macro is a special program that allows you to perform several repetitive actions in an application, for example, you can create a macro in Microsoft Office programs to perform the same actions.

Necessary
Microsoft Office
Instructions
Step 1
Create a macro, for example, in Excel. It will allow you to save a set of operations performed and perform it in the future using one command. To create a macro, plan the entire workflow that you plan to save as a macro.
Step 2
Please note that absolutely all actions will be saved, taking into account the correction of errors and the cancellation of operations. Run the command "Macro" - "Start recording" from the menu "Tools". In the "Record Macro" window that appears, enter the name of the macro to be created. In the "Keyboard shortcut" field, click the buttons with which you plan to run the macro in the future. Next, fill in the "Save to Book" field. Click OK. After that, the recording of the macro begins.
Step 3
Perform the operations that you plan to save and then assign the macro to the button. After completing all the necessary actions, click on the button on the toolbar "Stop recording". You can run the created macro using the assigned keyboard shortcut or using the "Tools" - "Macro" menu. You can also assign the execution of a macro to a button or object.
Step 4
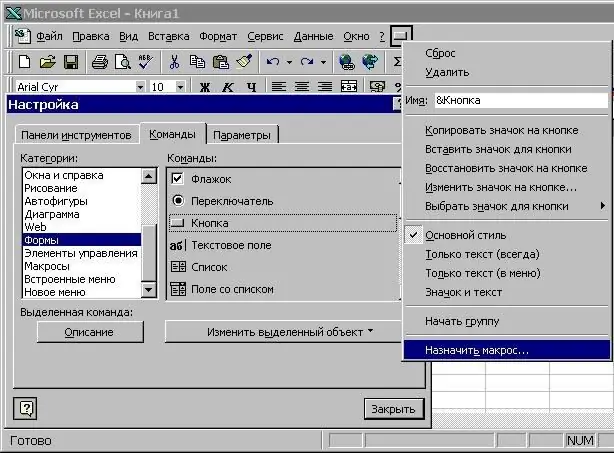
Assign the macro to the button. Excel has the ability to create your own electronic forms. To do this, you need to enable the "Forms" control panel. In this panel, select the "Button" tool. Draw a button on the desired location on the worksheet.
Step 5
In the dialog box that appears, select the "Assign Macro" option and select the created macro, click "OK". A button with an assigned macro has been created, you can change the text or reassign the macro using the context menu.
Step 6
Assign a macro to an existing button on the toolbar. To do this, select the menu "View" - "Toolbars" - "Settings". Call the context menu on the selected button, select the "Assign Macro" option. Select the macro you created earlier, click OK.


