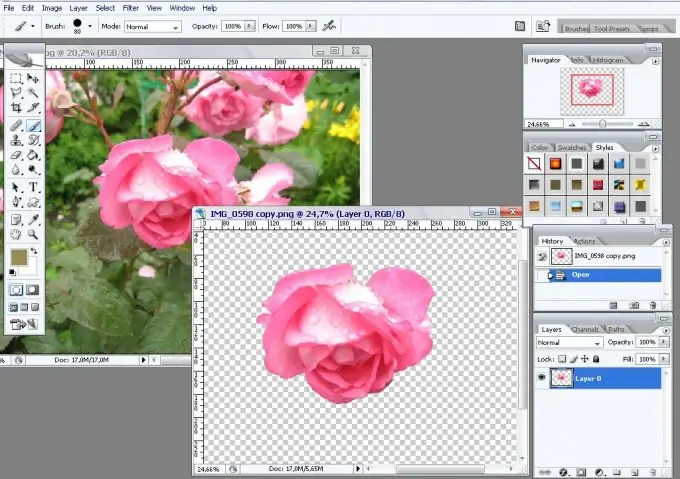
Those who are engaged in the design of Internet pages or blog posts have had to deal with the problem of the background color of the illustration. The background may not be the same color as the background of the page, or may look bad on it. There is always a way out - with the help of Photoshop you can make the background of the picture transparent.

It is necessary
- 1. Photoshop program;
- 2. the picture from which you want to remove the background.
Instructions
Step 1
Open the picture you want to make the background transparent in Photoshop. Select the File menu, the Open item. For quick work, you can use the "hot keys" Ctrl + O.
Step 2
In the Tools palette, which is on the left side of the Photoshop window by default, select the Brush Tool. To quickly select the Brush Tool ("Brush"), you can use the key B. In the Brush panel ("Brush"), which is located at the top of the program window under the main menu, adjust the parameters of the tool. The Brush tool has two parameters, Master Diameter and Hardness, which can be adjusted using the sliders, or you can enter numerical values for the parameters in the boxes above the sliders. The first parameter determines the size of the working brush. The second parameter determines its rigidity.
Step 3
Switch to Quick Mask mode. To do this, click on the right of the two rectangles at the bottom of the Tools palette. You can just press the Q key.
Paint over those areas of the photo that will remain opaque by holding down the left mouse button. The areas to be painted turn red. It is more convenient to outline small details of the image with a small diameter brush. The diameter of the brush can be adjusted on the fly.
Step 4
Exit the Quick Mask mode. To do this, click the left rectangle at the bottom of the Tools palette or the Q key.
Step 5
Make the picture a layer. To do this, in the "Layers" palette, move the cursor over the only layer there, right-click. In the context menu that appears, select the "Layer from background" item.
Step 6
Remove the background. To do this, select Clear from the Edit menu, or simply press the Delete key.
Step 7
Deselect the selection. To do this, in the Selection menu, select Deselect.
Step 8
Save the resulting image with a transparent background in.png"


