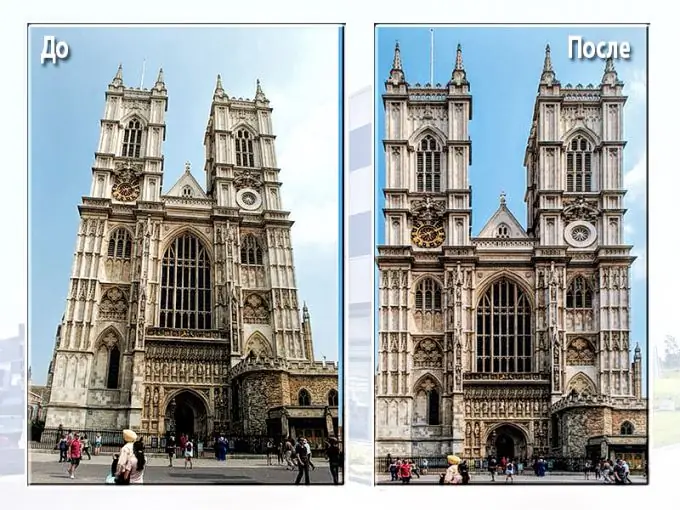
In the version of Adobe Photoshop CC there is a new function "Warp Perspective", designed to correct architectural images. It can also be used to create collages from photographs taken from different angles.

Instructions
Step 1
To work with Perspective Warp in Photoshop Preferences, you must turn on the GPU. To do this, in the "Edit" menu, select "Settings" and go to the "Performance" tab.
Step 2
Check the "Use GPU" menu item and click on the "Advanced options" button. Check the box next to "Use GPU to speed up computation." Click OK.
Step 3
Open the image in Photoshop and choose Edit> Perspective Warp. Click on the image and drag the cursor to create quadrangles corresponding to the planes of the edited object.
Step 4
Using corner handles, position the created quadrangles so that their edges are strictly parallel to the straight lines of the structure. Dock them together to determine the angles. After adjusting the position, click the "Warp" button.
Step 5
Move the corner handles to the desired position. For example, they can be positioned so that the edges of a building, photographed from an angle, "overwhelm" equally. This will give the image a more realistic look.
Step 6
Shift-click the edge of the quad. It will straighten and stay vertical (or horizontal, depending on the position) during further editing. Move the corner handles for more precise adjustments. The straightened edges will be highlighted in yellow.
Step 7
The Options panel contains three buttons that are used to automatically correct perspective: Automatically Align Near Horizontal Lines, Automatically Straighten Near Vertical Lines, and Automatically Align Vertical and Horizontal Lines.
Step 8
When finished editing the object, click on the "Confirm Perspective Warp" button. All parts of the image that are not included in the transformation area, if possible, will be preserved unchanged. The greatest number of "losses" is usually located at the edges of the picture. You will have to either crop the image, or complete the missing fragments.


