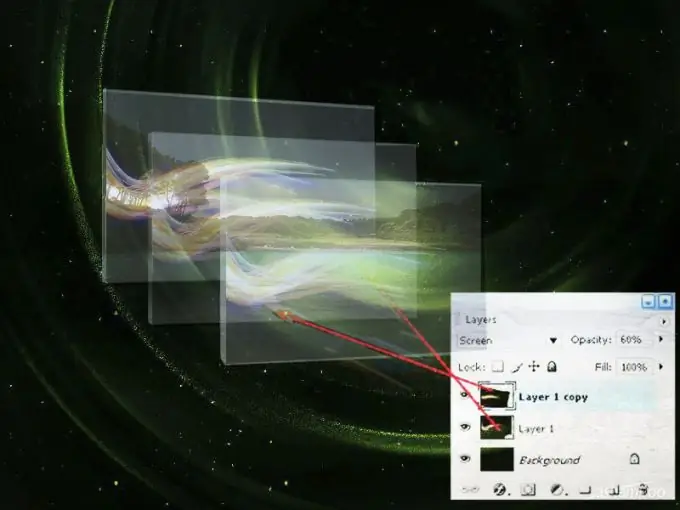
You can think of layers in Photoshop as a stack of transparent glasses, each with its own separate image. Any of them can be edited without changing the rest. And the overall image is made up of a combination of all layers.

What are layers for?
With the help of layers, you can change the image beyond recognition without spoiling the original. For example, you can add one layer for color correction, the second for sharpening, and the third for adding additional elements. The use of layers makes it possible to:
- resize an individual object without affecting other elements of the image;
- combine several images in one to create a collage;
- move image elements relative to each other;
- "hide" parts of the image, while revealing the contents of the lower layers;
- change the layer blending mode - the method of interaction between colored pixels located on different layers;
- adjust the color and lighting of the photo, while not changing the source.
When you save your work in psd or tiff format, Photoshop remembers all created layers. This makes it possible at any time to continue editing the image, change some effects or create new ones.
Layers Palette - "Layers"
A special palette is intended for working with layers, creating, duplicating, merging, moving or deleting them. It is called Layers. To open the layers palette, you need to click on the Window - "Window" button and select the Layers - "Layers" item from the drop-down list. You can also use the hotkey F7.
Each layer that exists in the document corresponds to a certain row of the Layers palette, on which you will see a thumbnail image of the layer and its name. The thumbnail can be enlarged. To do this, enter the palette menu (by clicking the small button at the top right) and select Panel options. You will be presented with a choice of several miniatures of different sizes.
At the very top of the layers palette there is a line for filtering layers by parameters. The choice of parameters is made from the drop-down menu or using the icons located on the right. First introduced in Adobe Photoshop CS6, this feature helps you quickly find layers with specific properties.
Below is a line that allows you to select the layer blending mode from the scrolling menu, set the degree of its opacity and fill. And, in addition, apply one of four types of locking, each of which protects the layer from changing certain parameters: Lock transparent pixels - protects transparent pixels, Lock image pixel - preserves pixel colors, Lock position - prohibits layer movement and Lock all - completely locks layer from any changes.
To the left of the layer thumbnail is the eye icon. If you left-click on it, the layer becomes invisible. And the pictogram changes to the image of a closed eye. You can turn on layer visibility by clicking again. To make all layers of the document invisible except the selected one, press the alt="Image" key and click on the "Eye" icon opposite this layer.
At the bottom of the Layers palette there is a row with buttons. With their help, you can perform the main tasks when working with layers - link selected layers to each other, apply layer effects, add a mask to the active layer, add an adjustment layer, group layers, create a new layer or delete a selected one.
When working in Photoshop, all actions are applied only to the active layer. To make a layer active, just select it by clicking on the corresponding line in the Layers panel. If a layer is selected, then its line is colored blue. To select several layers at the same time, hold down the Ctrl key and successively click on the lines with their names.
If you right-click on the line with the name of the layer, a drop-down menu will open with a list of all possible commands. Unavailable actions will be shown in light gray.


