BIOS is the basic input / output system. This is a firmware that launches and polls components and starts loading the operating system. An error in the BIOS settings can lead to the fact that the computer will be unstable or will not turn on at all. Very often this happens, and it is not always clear which parameter led to such a result. You can immediately fix all errors in the BIOS by resetting the settings.

Instructions
Step 1
Open the BIOS of your computer. To do this, press the power button or reboot. Press the DEL key immediately after the beep. You can press it several times - modern computers boot so quickly that it is difficult to catch the right moment, so feel free to click and the BIOS will open. On some models of motherboards, the button for entering the BIOS settings can be F2, F12 or F10 - this information is in the instructions, as well as in the bottom line of the screen when loading. If everything is done correctly, the system setting menu will appear on the screen.
Step 2
Find the factory reset menu. Look for Load fail safe defaults or Load Default settings. Navigate the menu categories using the arrow keys on your keyboard. Press the Enter button when you find a suitable setting item. This will reset all changes, which means that all possible BIOS errors will be corrected.
Step 3
Find the Save & Exit menu and press the Enter button. A message will appear in English asking you to confirm the changes. Press Enter or Y to save your changes. The computer will shut down and boot with the new "startup" settings. During the startup process, a message may appear stating that you must press F1 to continue downloading. Press this key and continue to start the computer.
Step 4
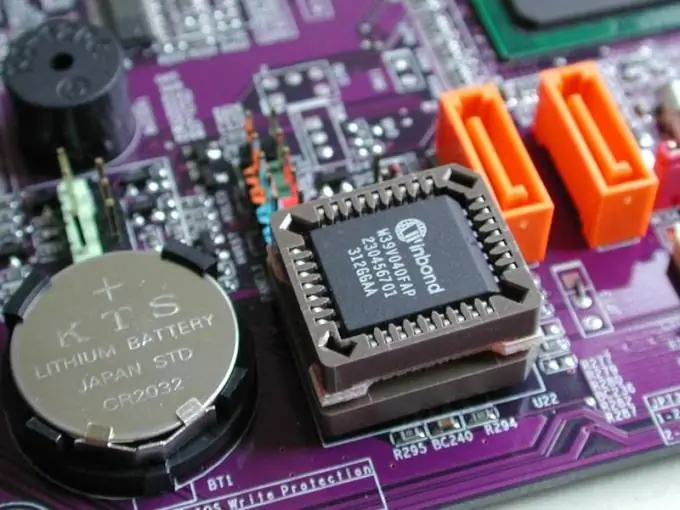
You can reset all BIOS settings by removing the battery. This is an alternative method that helps in cases when the computer does not allow entering the system settings or does not boot at all. Disconnect all cables. Take a Phillips screwdriver and a straight tip screwdriver.
Step 5
Remove the screws from the back of the system unit. Remove the side cover. Find a round, shiny battery about an inch and a half in diameter. The slot in which this battery is located has a clasp protrusion. Use a screwdriver to pry this tab and remove the battery. Leave everything on for 10-15 minutes - without power, all settings will be reset to zero, and this will fix errors in the BIOS.
Step 6
Install the battery into the motherboard, observing the polarity; the side with the lettering should be on top. Connect all devices to the system unit, connect the power cable. You can turn on your computer.


