A local or home network today is present in almost any home in which there are several computers, and in any organization, since it allows you to quickly and efficiently exchange files and documents within the network, providing access to any intranet computer. A local area network makes life much easier in a room with several computers and eliminates the need to transfer from one machine to another mass of data on disks and flash drives. Establishing a local network and connecting a computer to it is not as difficult as it seems at first glance.

Instructions
Step 1
In order to connect computers to a local network, make sure that all of them are equipped with valid network cards with working drivers.
Step 2
Also, to install a network, you will need a network hub or switch, which is sold in computer stores and is selected depending on the type of network - home or work, as well as on the number of computers connected to it.
Step 3
For a home LAN, you can use a regular ADSL modem with multiple cable connectors. Use straight network cables of sufficient length to connect.
Step 4
Connect computers with cables through network cards to a shared hub by plugging it into the network.
Step 5
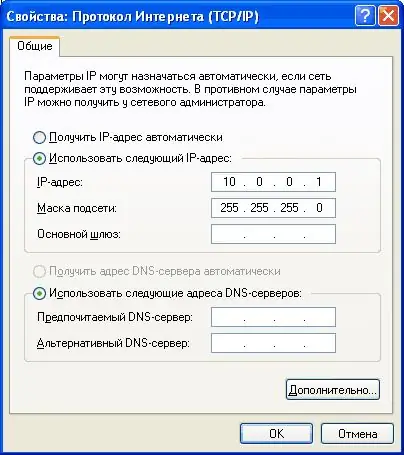
After all the lights come on, notifying you of a successful connection, start adjusting the network settings on the computers. On each computer, manually set the IP address, which should contain the following numbers: 192.168.2.
Step 6
After two, the fourth parameter can be anything - most often it corresponds to the computer number on the network, for example, 1, 2, 3, 4, and so on.
Step 7
Configure the workgroup on each computer. Make sure that on each computer the workgroup is called the same with different computer names - this is necessary for their correct display within the network.
Step 8
After setting up the workgroup, restart the computers. Then run them again, open the "Network Neighborhood" section in the Control Panel and click the "Show workgroup computers" link. The folder window should display all computers connected to your local network.
Step 9
After that, you just have to configure access to files and folders on each computer. Right-click on the hard disk icon, which should be accessible to computers on the internal network, and click "Properties", then in the "Access" tab, click "Share this folder."
Step 10
From now on, files from this disk can be exchanged within the local network.


