This tutorial is about several techniques for creating a long shadow effect often used in the latest design trends.

Necessary
- Adobe Illustrator CS5 or higher
- Proficiency level: Beginner
- Time to complete: 20 minutes
Instructions
Step 1
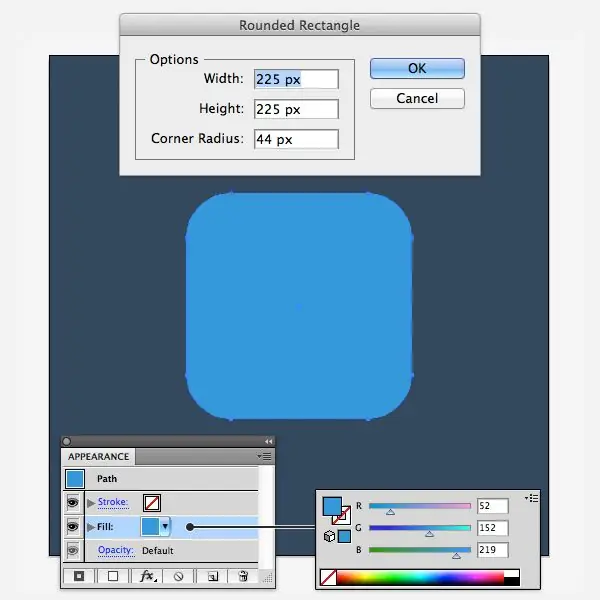
Create a new document, select the Rounded Rectangle Tool and draw a square.
Step 2
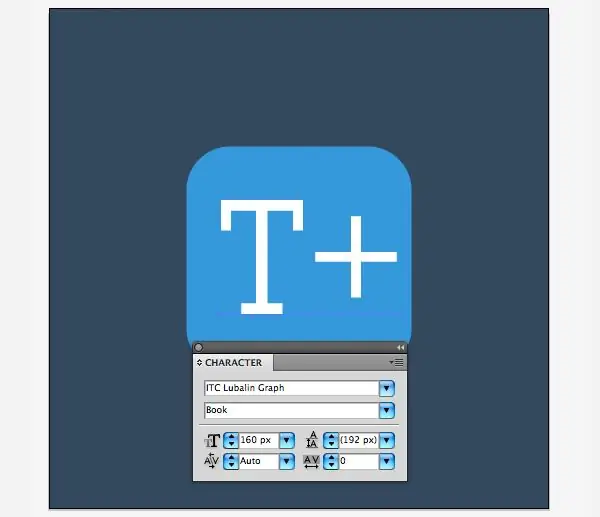
For clarity, I'll be looking at the techniques using text as an example, but they can be applied to any object you want.
Step 3
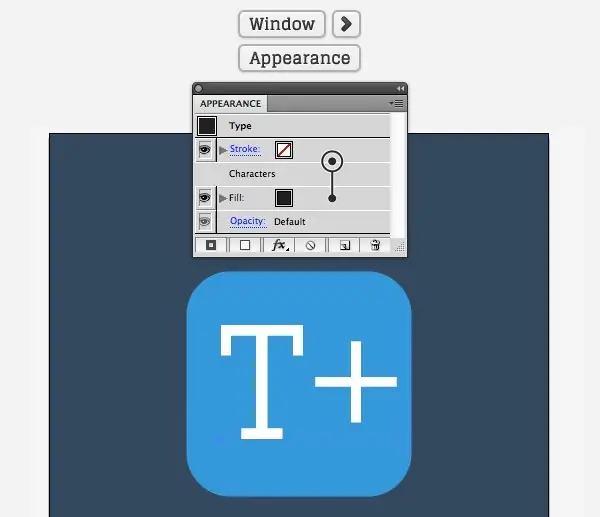
With the text selected, go to the Appearance panel (Window> Appearance) and click on Add New Fill at the bottom of the panel. Drag the created fill below the “Characters” level so that the effects are applied behind the text.
Step 4
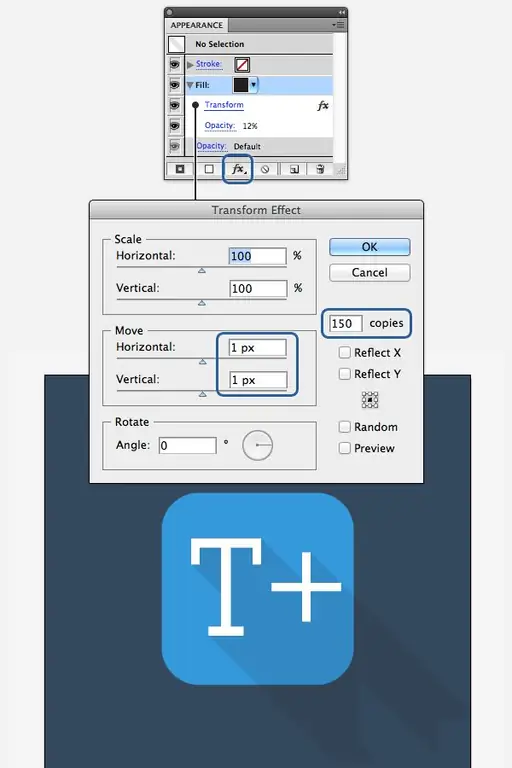
Select the fill layer in the Appearance panel, click Add New Effect at the bottom of the panel and choose Distort & Transform> Transform. Enter the values as shown in the picture. You can lower the Opacity to 12% or whatever you like.
Step 5
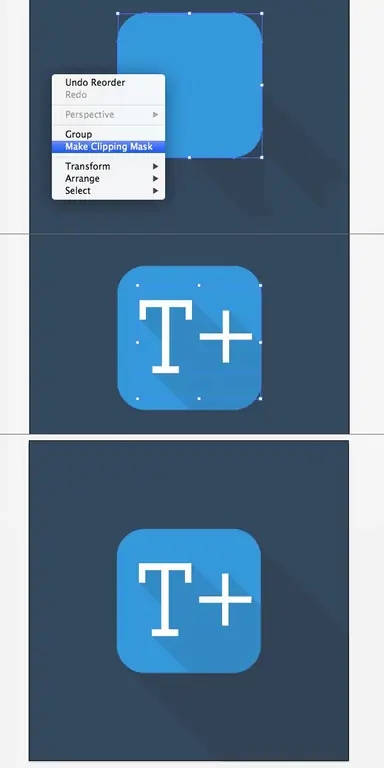
As you can see, we have created many copies of the fill and moved them slightly down to the right to create a smooth shadow. Unfortunately, the shadow is now outside the icon's bounds, so we need to create a clipping mask.
Select the rounded square, copy and paste it above the text layer. With the new square and text selected, right-click on the artboard and select Make Clipping Mask.
The shadow that goes beyond the border of the square will be hidden and now you can apply the same technique to create a shadow on the main square.
Step 6
Repeat steps 1 and 2. Select the text and press Ctrl + C> Ctrl + B twice to create three copies of the object. Select black for the bottom two copies.

Step 7
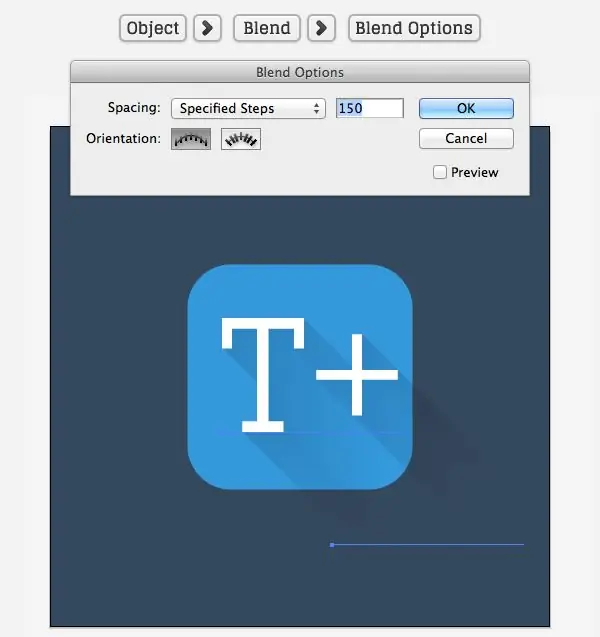
Select the lowest copy, hold down the Shift key and move the text as shown in the image. Reduce the Opacity to 0%.

Step 8
Select both bottom copies of the text, go to Object> Blend> Blend Options and enter 150 for the Specified Steps for a smooth blend.
Step 9
Now you can lower the Opacity of the resulting shadow to 12%, create a clipping mask for it as in the previous example and apply this shadow technique to the main square.

Step 10
The next technique is similar to the previous one, you create two copies of the text under the main one and make a smooth transition between them, but this time the lower copy does not need to be made transparent.
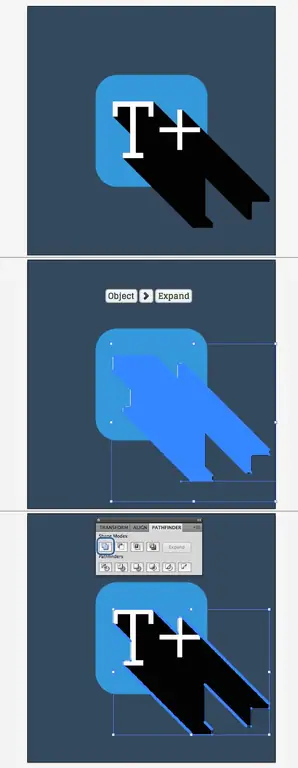
Select the created transition and go to Object> Expand. This will break the transition into 150 separate paths. Without deselecting them, go to the Pathfinder panel (Window> Pathfinder) and select Unite. This will merge all the selected paths into one.
Step 11
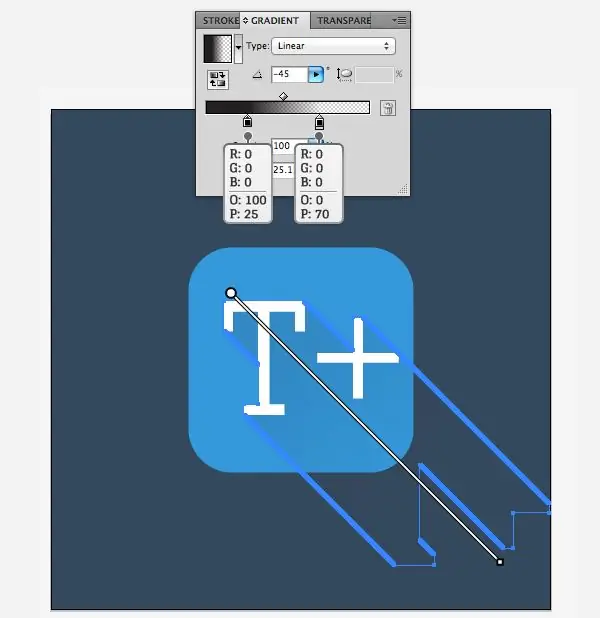
Select the Gradient Tool (G) and fill the created path with a gradient from black to transparent at an angle of 45 degrees. Then lower the opacity for this layer as you please.
Step 12
As you may have noticed, there are many unnecessary anchor points left on the path after merging. Let's get rid of them.
Since our path is quite simple, it will not be difficult to zoom in and out with the Pen Tool (P), after enabling Smart Guides (View> Smart Guides).
Another way is to select all unnecessary anchor points with the Direct Selection Tool (A) and press Del.
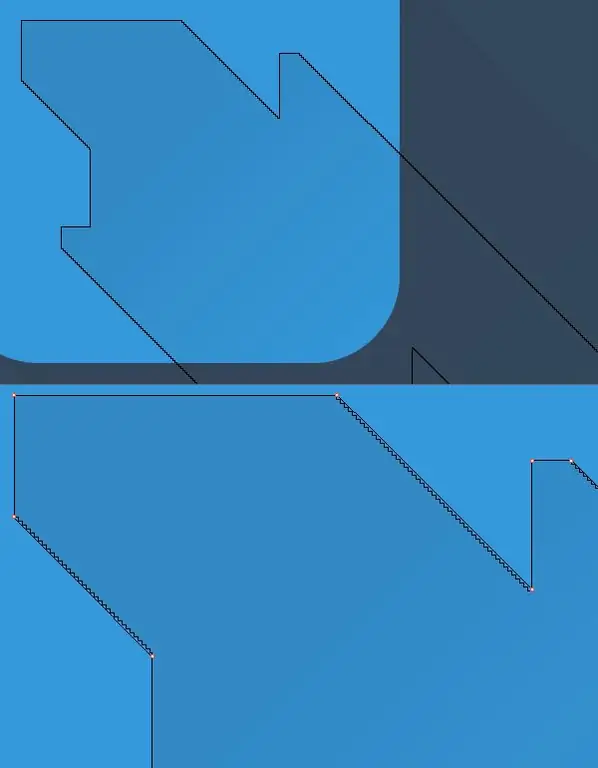
Step 13
Create a clipping mask for the resulting shadow and apply the same technique to the main square.


