In this tutorial, I'll walk you through a few simple effects you can apply to text to give it a retro look using the Appearance panel in Illustrator. These effects do not destroy the text object, so you can change the content of the text at any time while maintaining its appearance.

Necessary
- Adobe Illustrator program
- Proficiency level: Beginner
- Time to complete: 15 minutes
Instructions
Step 1
Create a new document of any size, as long as your text fits on it.
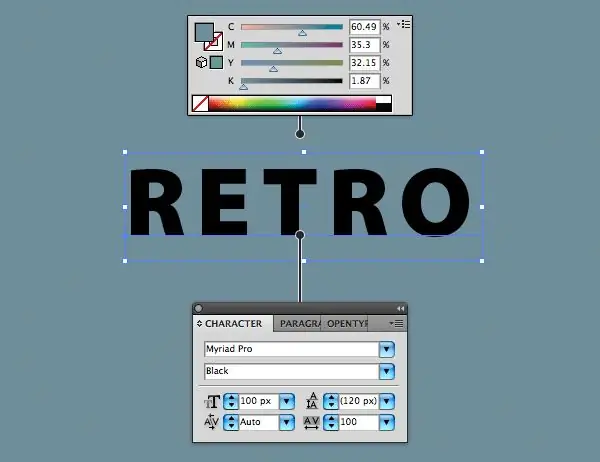
Paint the background with a nicely muted blue-gray color, select the Type Tool (T) and write a word using the settings shown in the picture.
In this case we are using the font Myriad Pro, color black, size 100px, tracking width 100.
If you do not have the Myriad Pro font installed on your system, you can use a different bold font.
Step 2
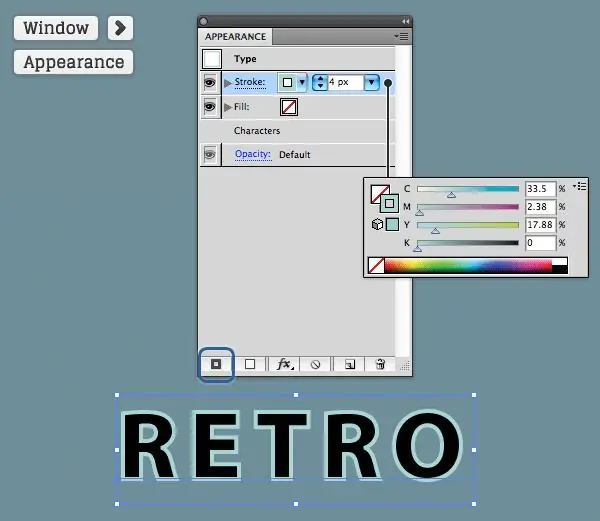
Select the text, go to the Appearance panel (Window> Appearance) and hit Add New Stroke at the bottom of the panel. Enter the values as shown in the picture.
Step 3
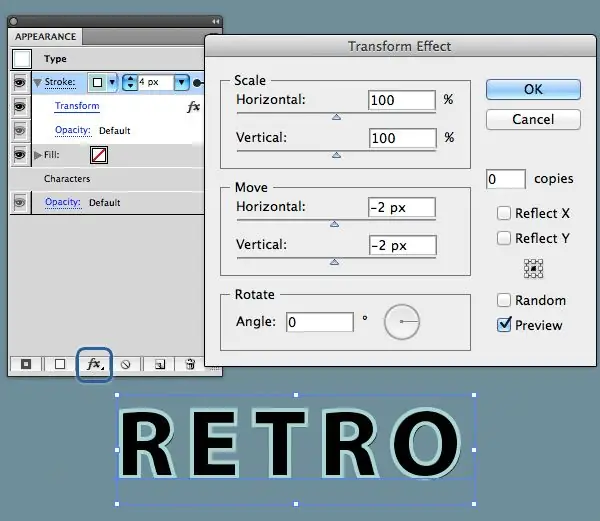
Select the newly created new stroke in the Appearance panel and click Add New Effect at the bottom of the panel. Then select the effect Distort & Transform> Transform, enter the values as in the picture and click OK to accept the changes.
Step 4
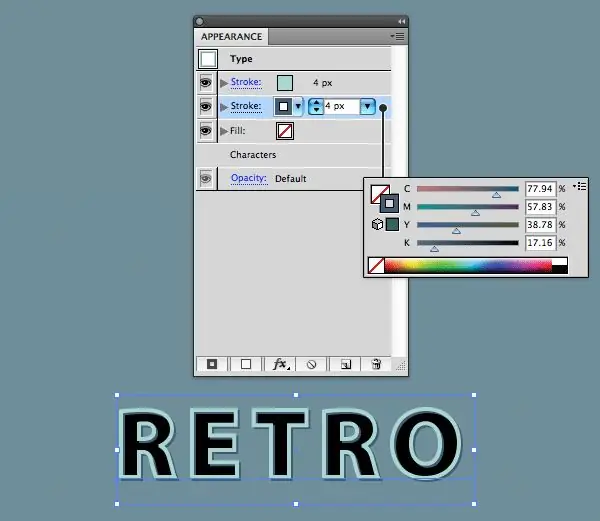
Add a new stroke as we did before, but with the settings shown in this picture. Make sure the new stroke is below the previous one in the Appearance panel. We will overlay a few more elements on top of each other, make sure that they are in the right order.
Step 5
Duplicate the created stroke and place it below the previous one. Apply the Transform effect to it as in the picture and set the Opacity to 34% to create the effect of a small inner shadow.
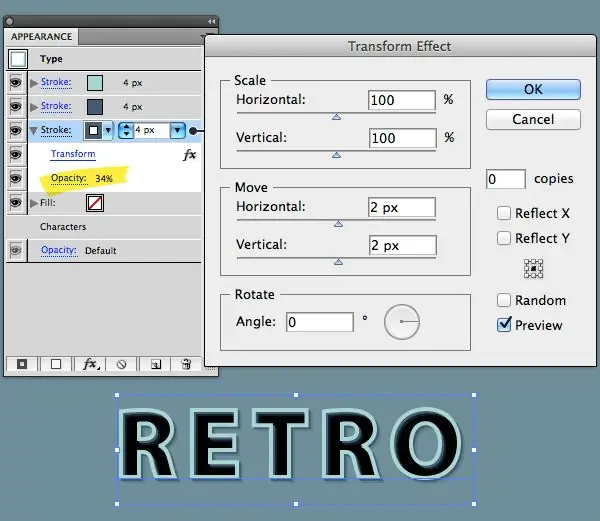
Step 6
When we first started editing the text object, there was already an empty fill layer in the Appearance panel - Fill. Select it and paint with the color of our first stroke.
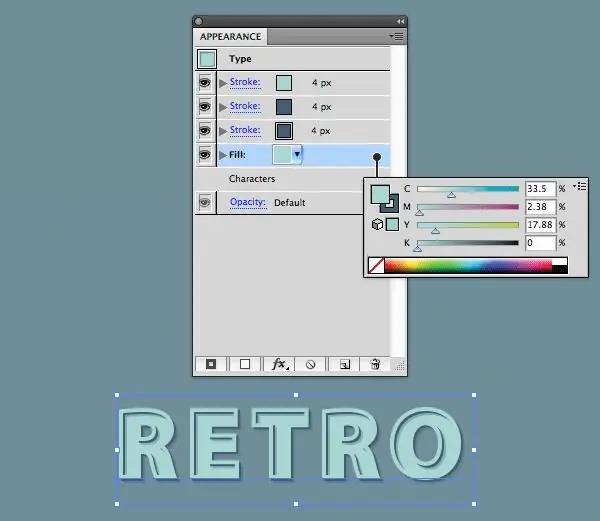
Step 7
Duplicate the fill layer and instead of the solid color fill it with your favorite pattern. I'm using a zig-zag here, but any black pattern with transparent elements will work. Set the Blending Mode to Overlay so that the black will blend in with the color underneath.
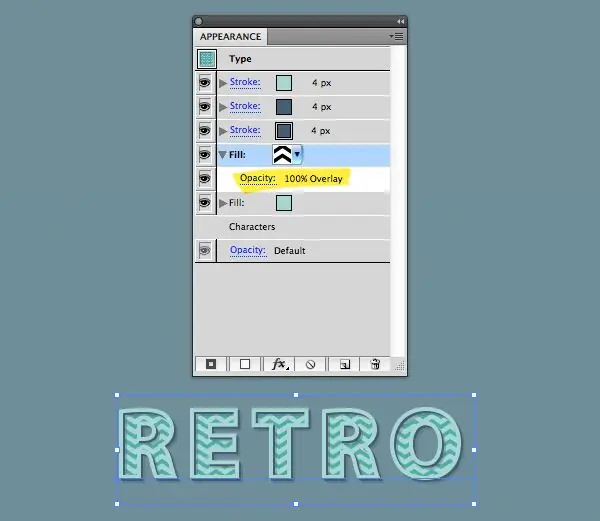
Step 8
Duplicate the dark stroke from the previous steps and place it below the fill layers in the Appearance panel. Select it, click Add New Effect and choose Distort & Transform> Transform. Enter the values shown in the picture. Before clicking OK, make sure you put 7 in the Copies field.
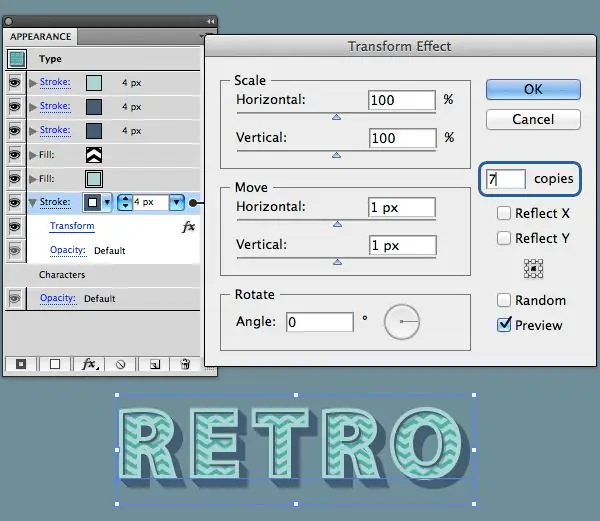
Step 9
Copy the last stroke and place it down. Click on the Transform link in the stroke properties in the Appearance panel to change the effect's parameters. Set Copies to 11 and click OK. Then change the Blending Mode to Multiply and set the Opacity to 25%.


