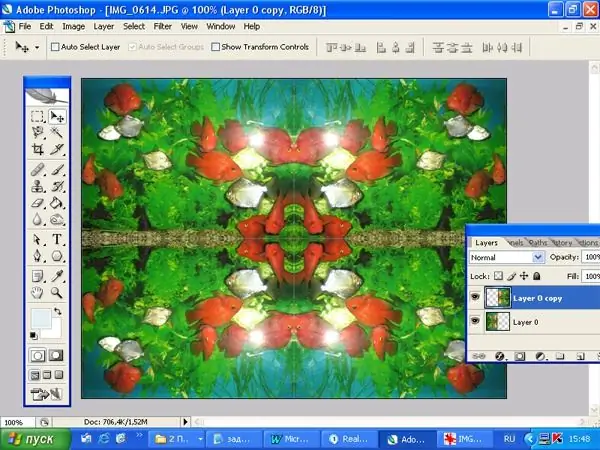
Any image with the help of Photoshop can become the basis of an interesting collage - it is enough to process it using this graphic editor. You can add new details to the image or delete existing ones, change lighting and color palette. Huge opportunities are provided by transformation tools, including rotation. How do you rotate a layer in Photoshop?

Necessary
graphic editor Adobe Photoshop
Instructions
Step 1
Open the image. If a castle is drawn on a layer, it means that you need to unlock it in order to apply any actions to it. Double click on the layer and rename it.
Step 2
It is better to make any changes to a copy of the layer so that the main image is not damaged. Make a copy of the layer by pressing Ctrl + J. Now you can apply any transformations to the copy. To rotate a layer, make it active. In the main menu, select the Edit item, then the Transform command. Select the option you want from the list. The Rotate 180 command will rotate your image 180 degrees.
Step 3
Rotate 90 CW rotates the layer 90 degrees clockwise, and Rotate 90 CCW rotates 90 degrees counterclockwise.
Step 4
The next group contains the Flip Horizontal and Flip Vertical options. They create a mirror image of the layer.
Step 5
By applying the Flip Vertical option, you will get a flip-down image.
Step 6
Free Transform is listed next to the Transform command. After you apply it to the layer, a rectangular frame appears around the image with knots in the corners, in the middle of the sides and in the center. By pulling on these knots, you can change the size and position of the layer.
Step 7
To rotate the layer to an arbitrary angle, move the cursor some distance from the nodule and wait until it looks like a semicircular double-headed arrow. By moving the cursor, you rotate the layer.
Step 8
Right-click on the framed image and you will see a pop-up menu with options for the Transform command. You can flip a layer before or after you apply a free transform to it.
Step 9
In addition to turns, transformation commands contain other possibilities. For example, you can add perspective properties to an image. To do this, select the Perspective option from the context menu. The appearance of the knots will change. Use the mouse to grasp the lower corner knot and pull it to the side. The image gains depth and perspective - the fish in the background appear farther away than in the foreground.


