In some cases, for example, with a slow Internet connection, paid traffic, or for any other reason, you may need to disable automatic Windows updates. This can be done in any of the following ways.

Instructions
Step 1
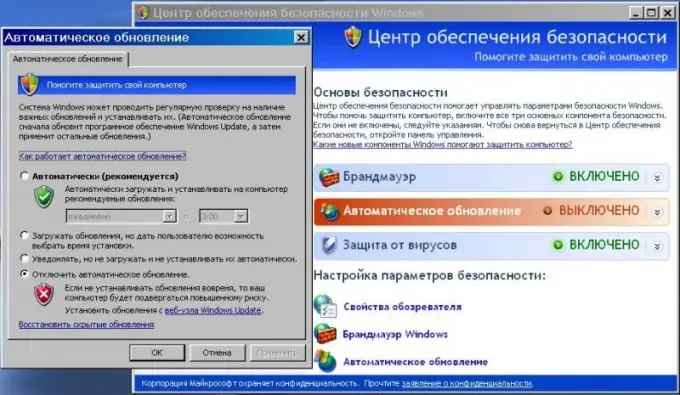
Right-click on the "My Computer" icon located on the desktop and select "Properties" from the context menu that opens. In the displayed "System Properties" window, go to the "Automatic Updates" tab. Set the switch to the "Disable Automatic Updates" position and alternately click the "Apply" and "OK" buttons.
Step 2
Open "Control Panel" from the "Start" menu. If this panel has a classic look, which allows you to display all available icons at once, select "Automatic update" by double-clicking the left mouse button on this icon. If the icons are displayed by category, select the Security Center category. In the lower part of the window that opens, under the heading "Configure security settings", select the required "Automatic update" option. In the window of the same name that appears, set the switch to the "Disable automatic update" position, apply the changes and click the "OK" button.
Step 3
As a rule, any of the above methods is sufficient to disable Windows updates, but it would be better to stop the corresponding service responsible for downloading and installing updates. To do this, go to the "Start" menu and click "Run", in the program launch window, enter services.msc and click "OK". On the right side of the "Services" window that opens, find and double-click the "Automatic Updates" line. In the drop-down list "Startup type" of the window that opens, instead of "Auto" put "Disabled". Click the Stop button to stop this service. Apply the changes and click OK.


