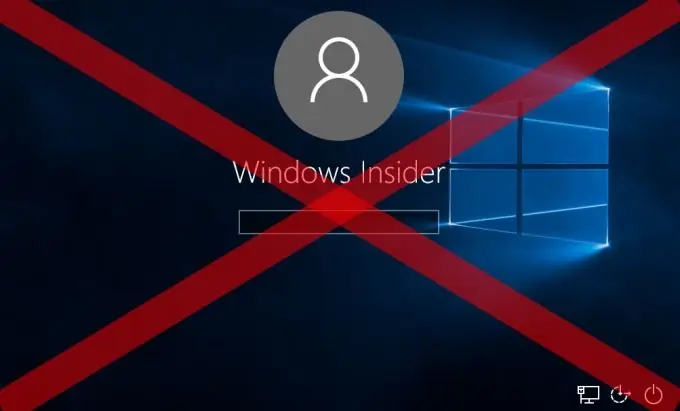
If you are the only user of the computer, you can disable the required password entry when logging into Windows 10. Let's see how to do this.
Necessary
a computer with the Windows 10 operating system
Instructions
Step 1
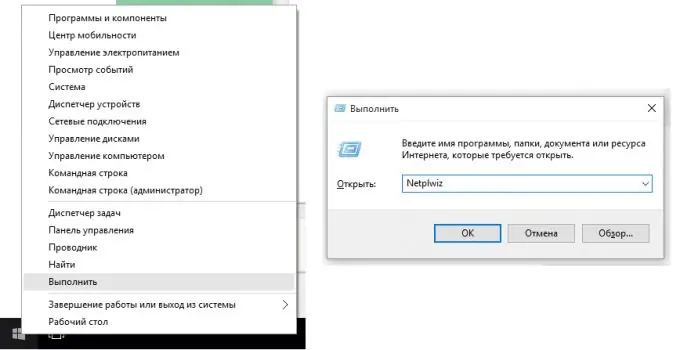
First of all, launch the "Run" window by pressing the Win + R key combination. You can call the same window by right-clicking on the "Start" menu and selecting "Run" from the menu that opens.
Now in the text line of the Run window, enter the Netplwiz command and press the OK button or the Enter key.
Step 2
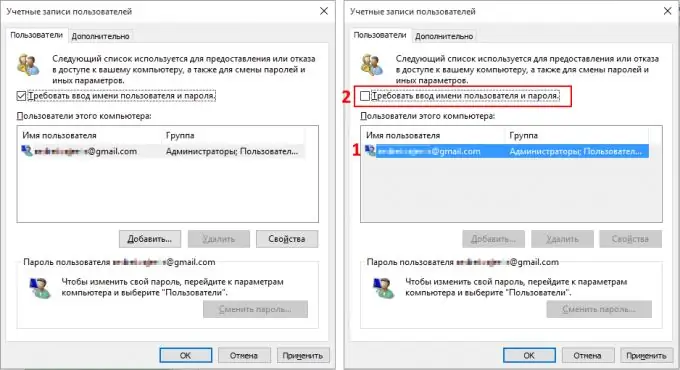
Now we select with the mouse the required user from the list of users by clicking on it with the left mouse button. And now uncheck the "Require username and password" checkbox.
Click OK.
Step 3
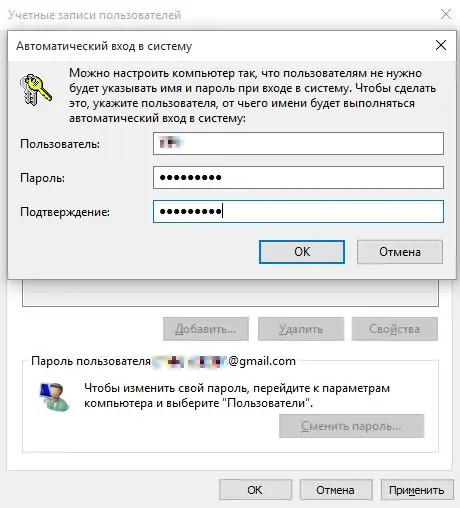
The system will ask you to confirm the decision to disable the password. In this case, you will need to specify the username on whose behalf the automatic login will occur, and confirm this by entering the password for this user. Click OK again.
If the password is entered correctly, the account management window will close.
Step 4
You can also configure passwordless logon through the Windows registry. This method is more difficult, but just as effective.
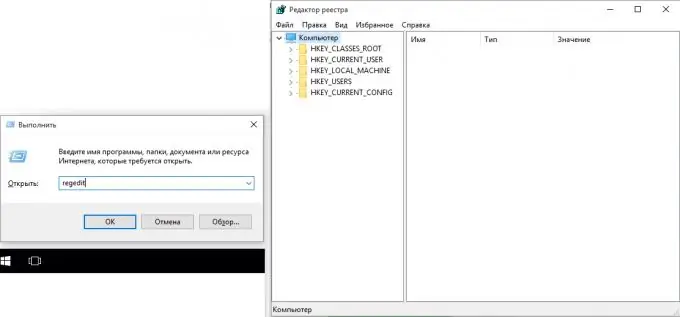
Using the Win + R command, open the Run window, and then enter the regedit command in the text field and press Enter. The Registry Editor will start.
Step 5
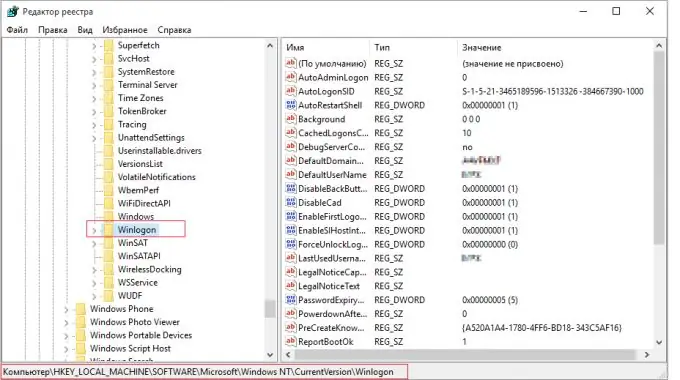
Go to HKEY_LOCAL_MACHINE / SOFTWARE / Microsoft / Windows NT / CurrentVersion / Winlogon. This section is responsible for logging users into the system.
Step 6
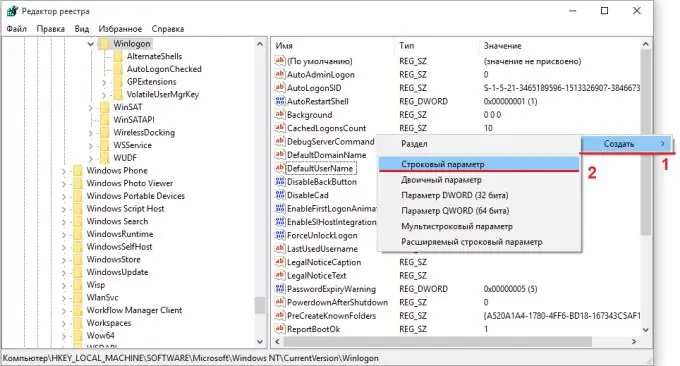
In the right field, where the properties of the section are listed, we find the DefaultPassword parameter. If it does not exist, then you need to create it. Right-click on an empty space in this field, select New -> String parameter from the menu.
Step 7
A new parameter will appear with a simple name "New parameter # 1". Right-click on it, select Rename and name it DefaultPassword.
Look at the value of the DefaultUserName parameter to see which user will be used for automatic login.
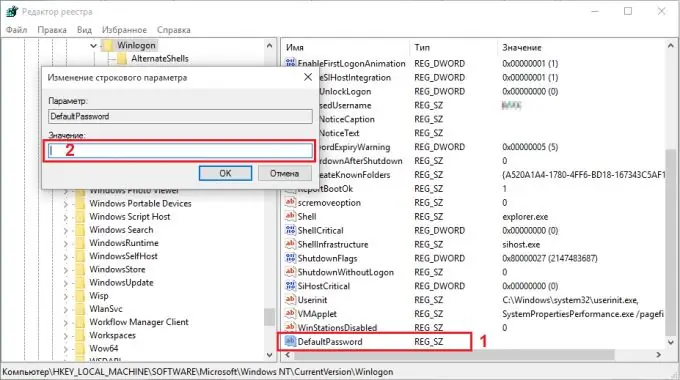
Type the password of this user into the "Value" field of the DefaultPassword parameter. To do this, double-click on the DefaultPassword parameter with the left mouse button and enter the password in the "Value" field. Click OK.
Step 8
In the same section, we find a parameter named AutoAdminLogon. Now its value is "0", you need to change it to "1". Double click on it with the left mouse button and change 0 to 1. Click OK.
Now you do not need to enter a password when entering the system, we have enabled automatic login. Close Registry Editor and restart your computer for the changes to take effect.


