On the Internet, you can now find various options for Windows OS installation disks, including programs, drivers, and various useful utilities. You can also create an installation disk yourself, including everything you need.

Necessary
- - computer;
- - the nlite program.
Instructions
Step 1
Follow this link https://www.nliteos.com/, download the installation file of the Nlite program designed to create OS installation disks, install the program on your computer. Insert the Windows installation disc into the drive, copy its contents to any folder on your computer, for example, Windows_Auto
Step 2
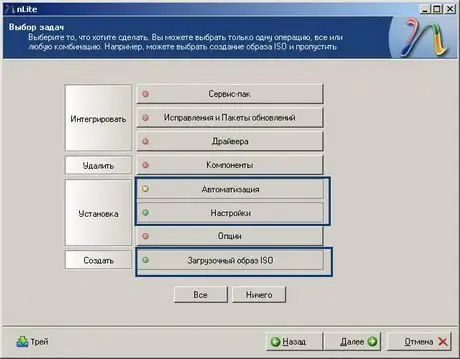
Run the nLite program, click the "Next" button in the first window, specify the path to the Windows installation files. Click "Next", select the necessary tasks to work with the distribution. To create a Windows installation disc, select the Automation and Bootable ISO options. Click "Next". On the General tab, select the Fully Silent Installation command in the Silent Mode field. Next, enter the OS serial number in the Product Key field, so as not to enter it during installation. Disable the "System Restore" option.
Step 3
Go to the "Users" tab to continue creating the Windows installation disk, specify the number of users and configure password access. Go to the "Network Owner" tab, set the network settings. In the "Regional" tab, set the language settings and time zone. In the "Automatic Updates" tab, set the necessary settings for updating the system. Go to the "Display" tab, set the required operating frequency, resolution and color depth. Click "Next".
Step 4
In the "Folders" section, specify the name of the directory where Windows XP will be installed, in the "Requirements" section, disable the option "Minimum requirements for memory and free hard disk space". Click Next. The program will ask whether to apply the settings made, click "YES", wait for the completion of work with the distribution kit. Insert the disc into the drive, go to the "Mode" menu, select the Direct Burn option, to immediately burn the distribution to disc, click "Burn". This completes the creation of the Windows installation disc.


