It has long become a tradition to beautifully design "demob", graduation and anniversary albums with photographs. They are painstakingly painted with colored pencils and paints, applications and poems are added … Modern technologies make it possible to create slideshows from photos, adding music, titles and video effects to clips.

Instructions
Step 1
One of the most readily available programs for creating and editing slideshows is Movie Maker, which is included with OS Windows. Open the C: / Program Files / Movie Maker folder and double-click the Movie Maker.exe icon to launch the program. For faster access, you can drag the launching file icon to the desktop by hooking it with the mouse.
Step 2
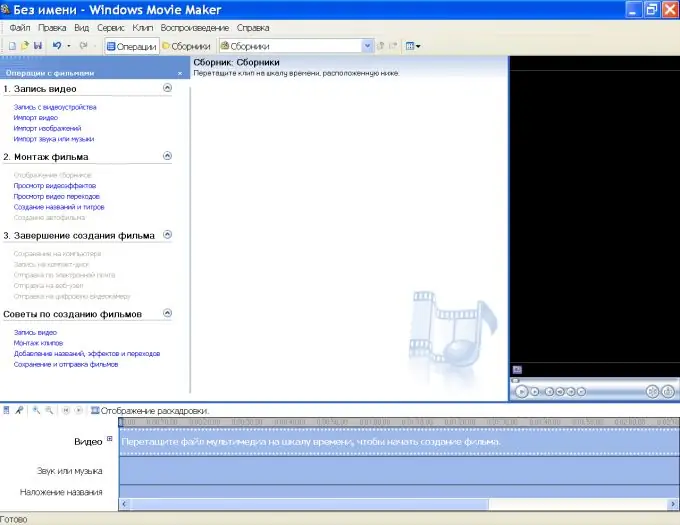
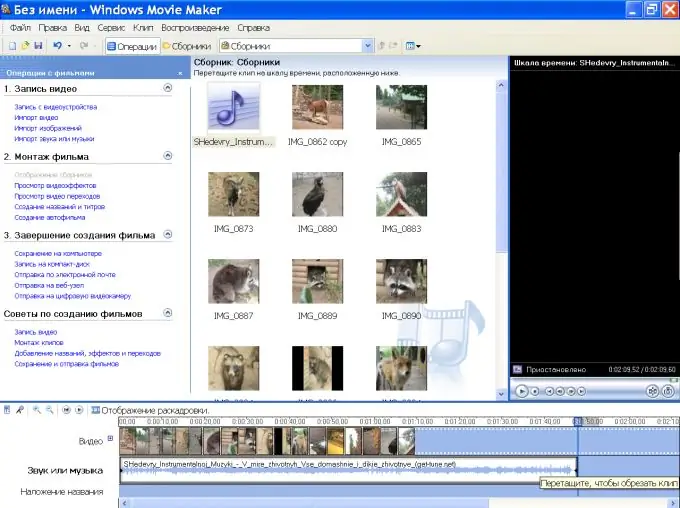
The top line of the program window contains a standard menu bar, familiar to everyone who works with Windows software products. 3 windows are placed under it: task area, content area and viewport. At the bottom is the storyboard and timeline area. The task pane lists all the commands available to users. The content area contains videos and photos that will form the basis of a clip or slideshow. In the storyboard / timeline area, you can change the duration of the frame, apply video effects to clips and transitions between them, add titles and music. In the preview area you can see the intermediate results of file processing and the finished clip.
Step 3
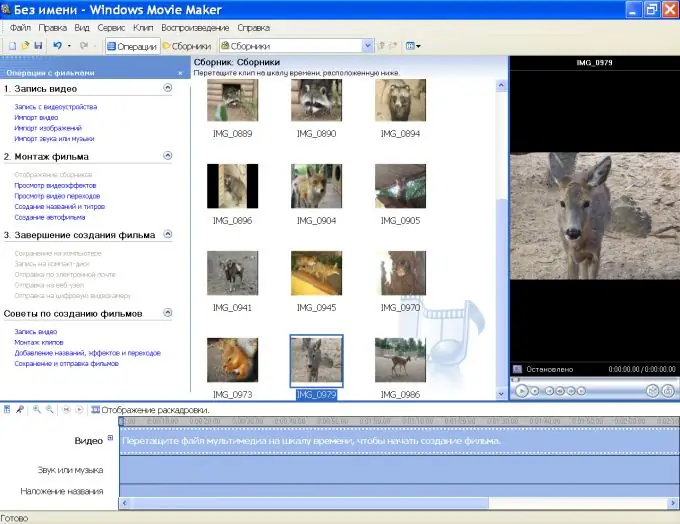
To make a slideshow of photos and pictures, in the task pane in the "Record video" section, click the "Import pictures" link and specify the folder from where you are going to take the picture files. If you want to use multiple images, hold down the Ctrl key and click on the required files, then click "Import". The pictures will be copied to the content area.
Step 4
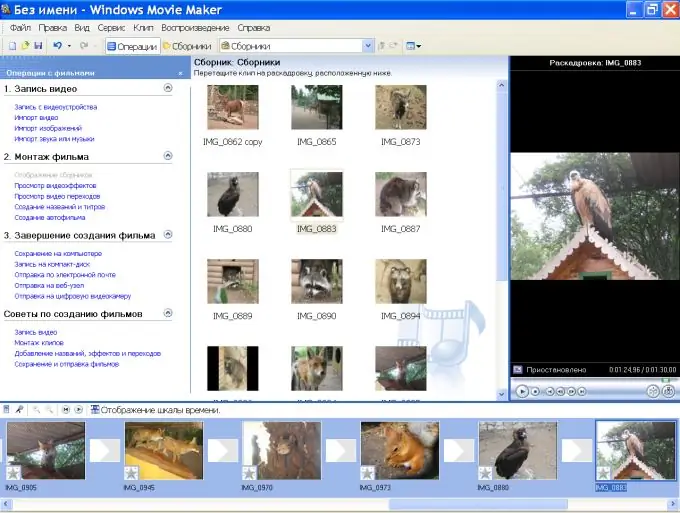
Now, one by one, click the photos with the mouse and drag them to the storyboard area. It is in this area that the slideshow editing takes place. It is displayed in two modes - storyboard and timeline. In Storyboard mode, you can change the sequence of frames and add the desired effects to the video sequence.
Step 5
Click the View Video Effects link in the Movie Editing section. In the view window, click the appropriate effect with the mouse and drag it to the selected frame in the storyboard area. For example, for the last frame you can add "Fade to black background". A family photo can be aged with an antique effect, and more. A small square with a star and a tooltip with the name of the effect will appear in the lower left corner of the clip.
Step 6
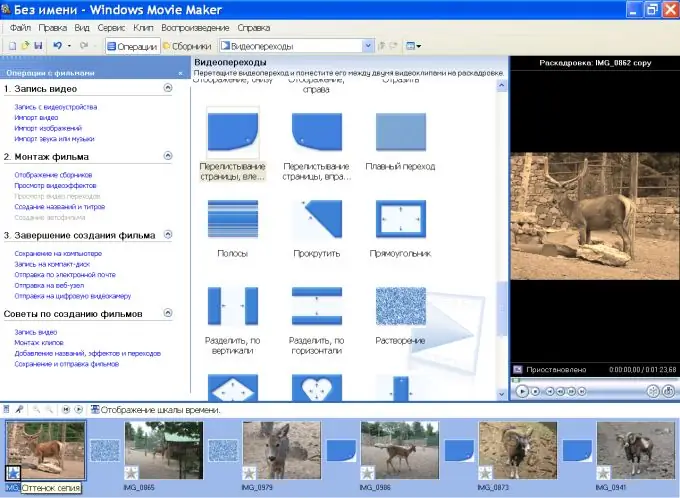
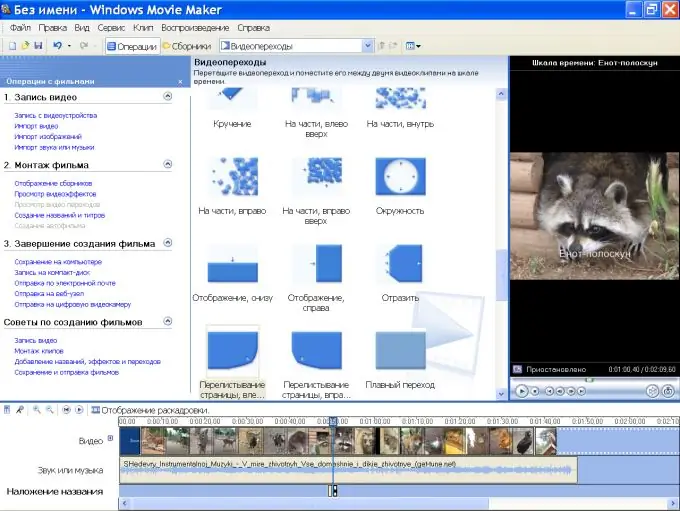
To style the transitions between frames beautifully, click the View Video Transitions link. Drag the effect icon between frames and watch the result in the preview window.
Step 7
In timeline mode, you can customize the duration of each frame and transition between them, trim the video clip and audio sequence, and add titles to the clip. In the task pane, under the "Record video" section, click the "Import sound or music" link, select the desired sound file and click "Import". Click "Timeline Display" and drag the audio file icon to the "Sound or Music" section.
Step 8
If the audio track is longer than the footage, you can trim the audio or lengthen the viewing time of the frames. To cut the sound, move the cursor over the right border of the audio track until it looks like two red arrows, hold down the border with the mouse and move it to the left. You can right-click on a track and select a sound effect, such as Fade out, to fade out the music.
Step 9
In the same way, you can edit the duration of viewing images. Click on the frame, move the cursor to the right or left border and drag in the desired direction. A tooltip appears indicating the current viewing duration.
Step 10
You can add a title to the slideshow, an explanation for each frame, and titles after the movie. To do this, in the "Film editing" section, click "Create titles and credits" and select the desired item. Enter your text in the field that appears. To add an animation effect of the inscription, click "Change title animation" and choose the appropriate type from the list provided. The preview will display changes to the label appearance. This way it is convenient to enter the title of the movie and the last credits.
Step 11
You can only label a frame in timeline mode. Click on the desired clip and select the "Create titles and credits" link. In the window "Where to add a name" specify the place for the inscription and its appearance. In the Title Overlay section, a narrow black and white icon appears below the frame. If you want to delete or edit a label, right-click on it and select the required command from the context menu.
Step 12
After all these actions, mark the first frame with the mouse and click the "Play timeline" button to preview the slideshow with superimposed music. Make the necessary changes if you are not satisfied with something. To save the file, go to the "Finishing the movie" section, click the required item from the list and follow the instructions of the save wizard.


