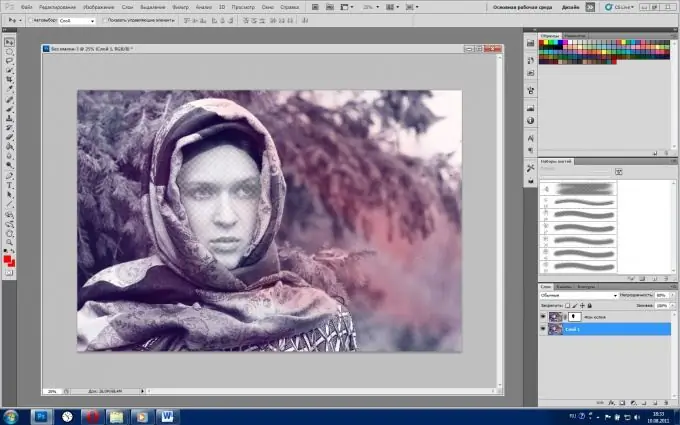
To try on the clothes of a resident of the era of Ivan the Terrible, it is not at all necessary to go to the theater and demand a proper costume from the local dressers. There is a much more relaxed option - find a corresponding PSD-template on the Internet and decorate it with your beautiful physiognomy.

Instructions
Step 1
Launch Adobe Photoshop (the author uses the Russian version of CS5) and open two files: a template in PSD format (a "Photoshop" document) and a photograph showing the desired face. To do this, click "File"> "Open"> select the necessary pictures> "Open".
Step 2
Switch to a photo with a face. Select Rectangular Marquee from the toolbar and draw a box around the head. The contour will take the form of the so-called "walking ants" - the boundaries of the selection, in the manner of a simple garland, flicker alternately with black and white stripes. Select the Move tool, click on the path and drag it to another file - the PSD template.
Step 3
The default template already has several layers. At least the face area and the background. Slightly more complex templates have more than two layers. These can be cut-out hats, scarves, umbrellas and other items that can be found around the head. Move the layer with the face cut out in the second step of the instruction behind similar layers.
Step 4
Find the "Layers" panel in the lower right corner of the program, click on the layer with the face (if for some reason it is not selected) and drag it below the indicated layers with additional elements. If your template only has a blank area instead of the head, drag just below the main layer.
Step 5
If the dimensions of the face do not match the template, they can be changed. Select the face layer, and then click Edit> Transform> Scale. A frame appears around the face. Moving its sides and corners, correlate the face with the dimensions of the template. To rotate the frame around an axis, activate the appropriate mode: "Edit"> "Transform"> "Rotate". Grasp the edge of the frame and turn it in the direction you want. Press "Enter" for the changes to take effect.
Step 6
To save the result, click "File", then "Save As", in the "Files of type" field, select JPEG, specify the path and click "Save".


