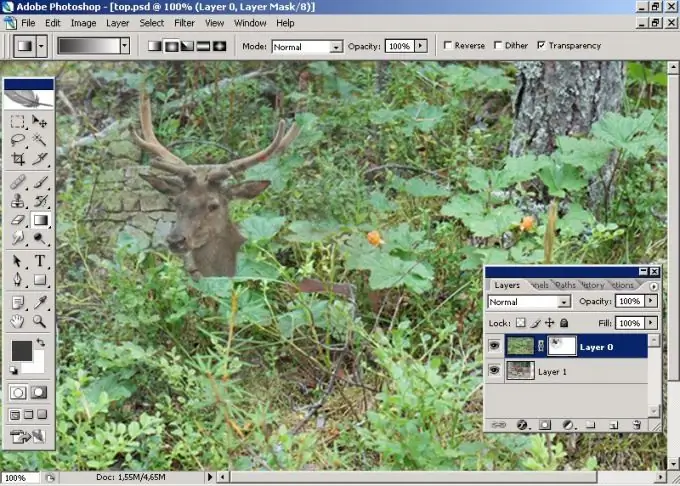
Masks in Adobe Photoshop are needed, as in life, to hide from viewers what they should not see. Masking tools from the arsenal of this graphics editor help to create images that are very similar to reality.

If you only need to process part of an image, it is convenient to use the Edit in a Quick Mask Mode tool. It can be called by pressing Q on the keyboard. Select the black brush from the toolbar and paint over the part of the image that you want to leave unchanged.
The drawing is covered with a red transparent film. If you accidentally paint over an extra section, set the foreground color to white and paint over this area. To return to standard mode, press the Q key again. A selection appears instead of a red tape. The selection will be protected from any manipulations that you do over the image.
The security level can be changed. To do this, you need to use grayscale when painting over part of the image. The darker the color, the less the impact on this area will be. This is very useful if you need smooth transitions when processing drawings.
The selection created in Quick Mask mode can be saved. Open the Channel palette and click the Save selection as channel button. By default, the selection is named Alpha1, 2, 3, etc. You can rename a channel by double clicking on its name.
To load a selection, from the Selection menu, choose Load. You can also go to the channel panel and click on the desired name.
It is very convenient to use a layer mask to create collages. Let's say you need to make a new image from two drawings. The top layer should be partially transparent so that the fragments of the bottom layer are visible under it.
Activate the top layer. On the layers palette, click the Add layer mask button. A white mask thumbnail appears next to the image icon. If you paint on a white mask with a black brush, the drawing of the lower layer will show through. To restore the top image, paint over the area with a white brush.
Many painting tools can be applied to a layer mask. Select the Gradient, on the Properties panel set Radial and the color transition from black to white. Extend a gradient line from the center of the drawing to the corner. The new image will consist of the center of the bottom layer and the periphery of the top one.
Using the brush tool and different shades of gray, you can hide and reveal portions of different layers.
If you select the Add layer mask button while holding down the Alt key, the black mask will hide the top layer. To restore the hidden image, you need to paint with white paint, to hide - with black.


