You have purchased a new (replacement or in addition to your old) hard drive and installed it in your computer. Now you need to prepare it for work. Decide how many parts to divide the disk space into - create a partition (one or several). Let's consider a way to create partitions in Microsoft Windows XP.
Necessary
- Computer with Microsoft Windows XP operating system;
- Mouse and keyboard skills;
Instructions
Step 1
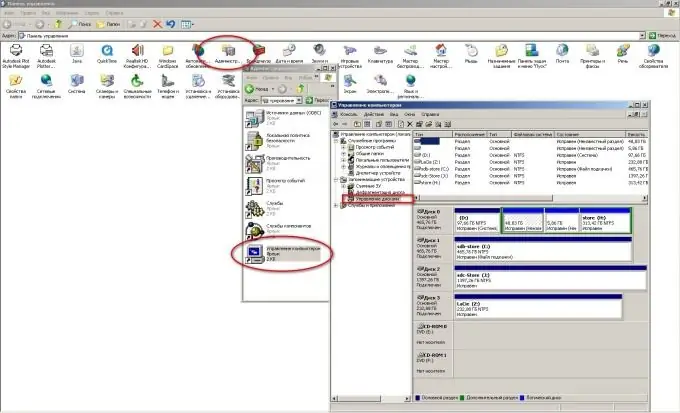
Immediately after the operating system detects a new disk and installs drivers for it, it is still impossible to work with it - it needs to be initialized. After initialization, it will be possible to create and format one or more partitions on it. To do this, open the Computer Management console.
Step 2
You can open it in one of the following ways:
Right-click on the "My Computer" icon on the desktop or in the "Start" menu and select the "Control" line in the menu that opens;
Open through the "Control Panel" (click "Start" -> "Settings" -> "Control Panel"). Select "Administration" and "Computer Management".
Step 3
The "Initialize and Convert Disk Wizard" should now start. Click "Next", "Next", after the inscription "The work of the initialization and conversion wizard has been successfully completed" appears, click "Finish".
Step 4
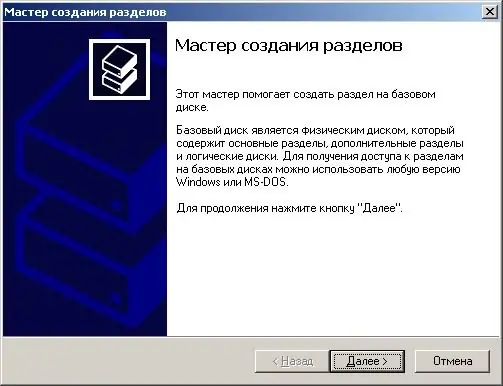
If everything went well, then in the "Disk Management" window ("Computer Management" -> "Storage Devices" -> "Disk Management") a new disk with the mark "Not allocated" will appear. Click on it with the right mouse button and select "Create section …" in the context menu. The "Partition Wizard" will start, click "Next".
Step 5
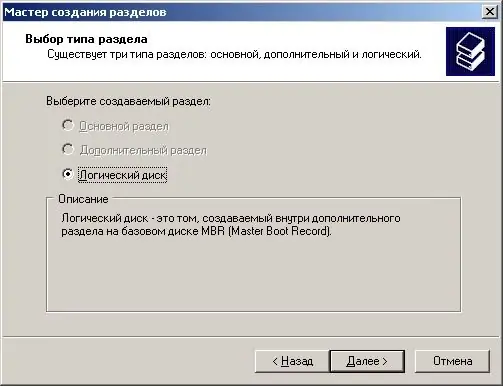
In the next window, select the type of the partition to be created - Primary or Logical (the Primary partition is selected by default), "Next".
You can create several partitions on one physical disk, but no more than four main partitions. One or more logical drives can be created in an additional partition. The main one differs from the additional one in that the main partition can be used to start the operating system, but the logical one cannot. The partition where the operating system files are located is marked and called active. Only one section can be active.
Step 6
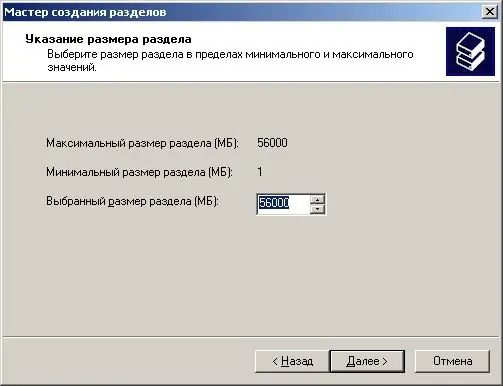
Select the size of the partition to be created (by default, the maximum possible size is set).
Step 7
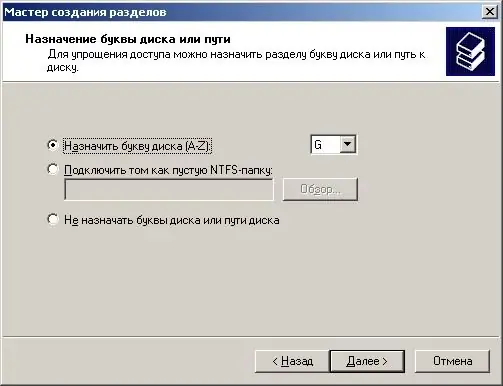
Selecting a drive letter. It can be any letter of the Latin alphabet, not yet used to designate another disk or partition.
Step 8
Set the formatting parameters (file system type (NTFS by default), cluster size (I advise you to leave "Default"), volume label, whether to apply fast formatting and compression of files and folders), completing the selection, press the "Next" button.
Step 9
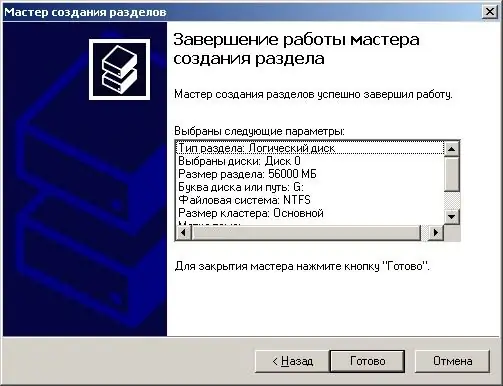
Before completing the Partition Wizard, a window will be shown containing a summary of the options we have selected. If everything matches the choice made, click "Finish".
Step 10
When formatting is complete, the Not Distributed mark will change to Good. You can get to work.


