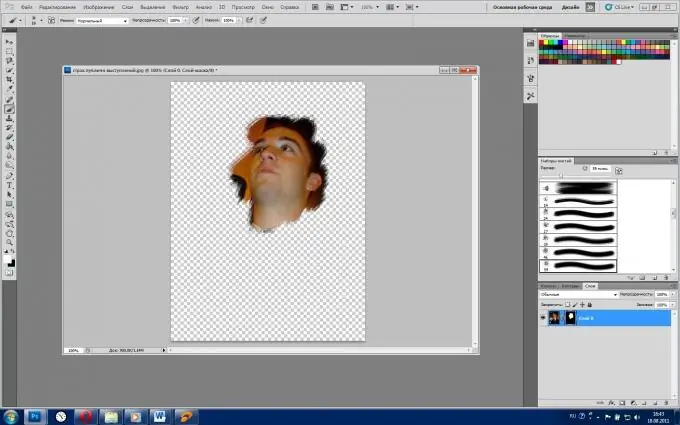
Using layer masks in Photoshop may be useful in different situations, for example, when replacing similar elements. Let's say human faces. However, at the very beginning of the work, you will need to paint the mask black, i.e. make it opaque.

Necessary
Russified version of Adobe Photoshop CS5
Instructions
Step 1
Launch Adobe Photoshop and open an image in it: File> Open> select File> Open.
Step 2
In the lower right corner of the program, find the "Layers" window (if it is not there, press F7), select the "Layers" tab in it and double-click on the background. In the window that appears, immediately click "OK". This will turn the background into a layer called "Layer 0". You can give it some more sonorous name, but in our case it is not so important.
Step 3
Click the Add Layer Mask button at the bottom of the Layers tab, shown as a square with a circle in the middle. Next to the "Layer 0" image, the Layer Mask emblem will appear as a white rectangle. Switching between the layer itself and its mask is carried out with a simple click, and the active element is framed by a small frame.
Step 4
Make sure the layer mask is active and press Ctrl + Backspace. Thus, you will fill the mask, which is currently the foreground of the document, conditionally black, but the work area will be painted with a background mesh. If you need to deactivate the mask, right-click on its emblem and in the menu that appears, click "Disable Layer Mask".
Step 5
To give the mask a specific shape, select the Brush tool and paint over the desired area. The default fill color is set to white, but if you choose blue, red, green, etc., it turns into one of the shades of gray, and this, in turn, affects the transparency of the mask display.
Step 6
Two tools can be used to make the mask opaque again. The first is a brush, but set the fill color to black. The second is "Eraser" (hotkey - Latin E, switching between adjacent tools - Shift + E).
Step 7
To save the fruits of your labors, click File> Save As> select a path, select the file type JPEG (if this is the final result) or PSD (if you still intend to work on this project)> Save in the field.


