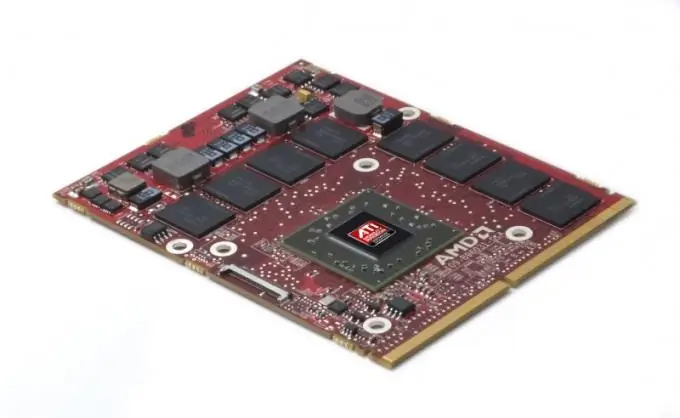
Replacing the video card can be carried out both in computers and laptops. Some laptop models have support for installing external video cards, which allows users to make improvements or repairs to the equipment. It should be noted that not all devices support video card replacement.

Necessary
- - screwdriver;
- - thermal grease.
Instructions
Step 1
Notebooks that have the option to replace the video card are equipped with an MXM connector. The presence of this slot indicates that the device has a discrete graphics card from a third-party manufacturer that is not soldered to the motherboard. If your laptop has only an integrated graphics card, for example, from Intel, the replacement procedure is not possible, because such adapters are built into the motherboard and cannot be removed without special hardware.
Step 2
Turn off your laptop and unplug it from the outlet. Pull out the battery from the back of the device using the special latches on the case. Unscrew the screws holding the main cover of the device using a screwdriver.
Step 3
All the hardware installed on the computer is located under the cover. It is worth noting that on some laptop models a special section is made in the case for replacing the video card. Therefore, before removing the cover, carefully examine the case for removable parts and individual blocks.
Step 4
To remove the graphics card, you will need to remove the cooler that is attached to the top of the graphics chip. Unscrew the securing screws, and then remove the power connector from the slot on the motherboard. Then remove the heat cushions, which are also secured with special screws, and set them aside. Remove the device as carefully as possible so as not to damage the fragile graphics chip.
Step 5
Unscrew the MXM board by removing the remaining screws. After that, carefully lift the card and remove it from the slot. Remove the thermal shroud from the old card and attach it to the new adapter in the same way. This must be done so that the placement of the casing thermal spacers matches the position of the memory blocks.
Step 6
Install the new graphics card in the slot and apply a thin layer of thermal paste to the GPU, then screw the card and install the laptop cooling system. It is worth noting that the thermal paste should cover the entire chip evenly.
Step 7
Install heat pads and secure the cooler. Reassemble the plastic parts of the laptop and replace the protective cover. After that, you can start the laptop to check the work results. The video card installation is complete.


