Sometimes it happens that the system issues a message about the lack of virtual memory. The problem is not serious if there was such a message once, but if it pops up regularly, then the system urgently needs more free space in virtual memory.

Instructions
Step 1
Right click on the My computer icon in the Start menu or on the desktop.
Step 2
In the context menu that appears, select Properties at the bottom. The System properties window will open. It will have several tabs.
Step 3
Go to the "Advanced" tab by clicking on it with the left mouse button. There you will see three sections of settings, each of which has its own button "Settings" (Settings), which brings up the settings window.
Step 4
Click on the "Settings" button under the "Performance" settings. The Performance settings window opens. This window will have three tabs. Click on the "Advanced" tab.
Step 5
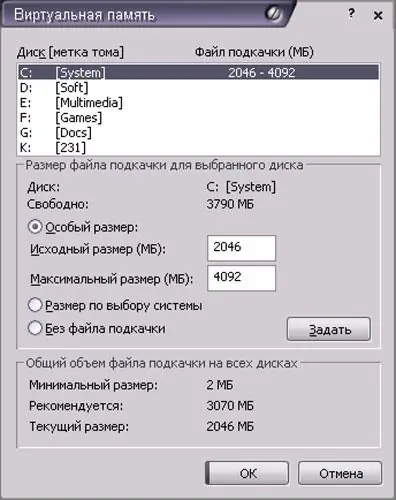
Left-click on the Change button at the bottom of the window under Virtual memory. The settings window of the same name will open. The top part of this window is occupied by a list of local disks functioning on your computer. Select the local disk where you want to free up virtual memory. In the value entry window, you will see the current values of the original size of your virtual memory and its maximum size.
Step 6
Increase these values to get more free virtual memory on your computer.
Step 7
If your system often displays a message about the lack of virtual memory, and you do not know what size you need, then let the system allocate the amount of virtual memory for its needs automatically. To do this, select the "System managed size" mode. Confirm your choice by clicking OK. This will save you annoying system warnings and keep your virtual memory under control.


