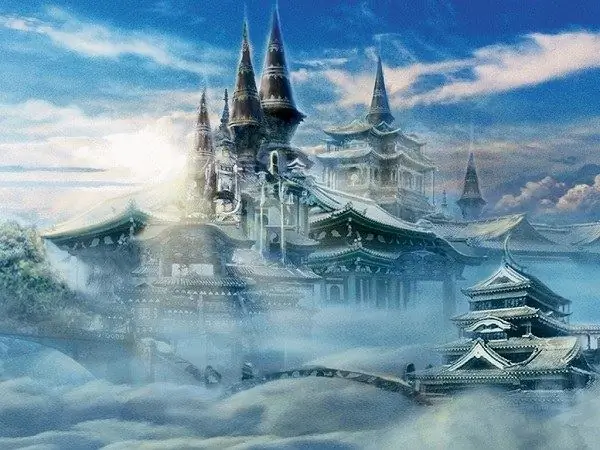
Using the graphics editor Photoshop, you can do wonders: create fabulous collages, turn girls into fairies, erect fantastic buildings. The simplest example of a fantasy landscape is a castle in the clouds, which anyone can make using Photoshop's tools.

Necessary
suitable photos for editing
Instructions
Step 1
Search the internet for large images of several storm clouds and a white cloud, hills and a castle. It is desirable that the selected photos are clear and not blurred. Open the folder with your saved images. Create a new document by clicking on File → New or Ctrl + N. Set a large size to the new canvas. Turn on the layer palette with the F7 key if it is not on. Drag the cloud photo from the folder onto the canvas.
Step 2
Duplicate the clouds layer by pressing Ctrl + J. In the top menu, click Image → Adjustments → Auto Contrast (in some versions of Photoshop, this path is shortened to Image → Auto Contrast). In the Layers panel, select the Overlay mode from the drop-down list of modes and set the Opacity to 45%. Merge both layers into one with Ctrl + E. If necessary, increase the sharpness in Filter → Sharpen → Sharpen.
Step 3
Use the Patch Tool in the toolbar if you want to create a more dramatic sky. The patch will be useful if half of the image is darker than the other. To do this, duplicate the layer with the Ctrl + J combination, shift the dark part to the light one, without completely overlapping it. Select a patch.
Step 4
Draw a circle on the seam that appears between the dark and light parts. Place the cursor inside the selection. Drag the selection onto a piece of the photo that can overlap the seam. To deselect, press Ctrl + D. Repeat several times until the seam disappears. Save the file, so as not to lose data, in the.psd format with any name.
Step 5
Drag the hill images and paste them onto the clouds image. Place the hillside layers side by side so that one photo overlaps the other slightly. Select both layers and press Ctrl + E to merge them into one layer. Use the Patch Tool to gently remove the seam between the hills. Observe the color scheme and avoid too black or too white spots. Move the hills down so that half of them are visible.
Step 6
Switch to Quick Mask editing mode by pressing Q. Select a black hard brush from the toolbar. Paint the sky over the hills, erasing any extra strokes with the Eraser if necessary. Exit mode by clicking Q again, press Ctrl + Shift + I. Press Del on your keyboard. Merge all layers by pressing Ctrl + Shift + E. Then hold down Ctrl + U and put in the box next to Saturation -50.
Step 7
Place a castle on the canvas by dragging and dropping it from the folder. Take an eraser, reduce its Hardness to zero and set the Opacity to 30-40% in the top bar. Erase the foundation of the castle so that it looks like it is floating, and click the eraser on the sides of the castle several times. Open the second image with a white cloud and transfer it to the working canvas. Erase the sky around the cloud with the eraser, changing the eraser's opacity to 100%. Place the cloud under the castle, hiding the erased castle foundation.
Step 8
Merge all layers by pressing Ctrl + Shift + E. Duplicate the layer with Ctrl + J and in Image select Adjustments, then click on Curves. Make the image dynamic by placing two points - at the top (approximate coordinates: 202 Input, 255 Output) and at the bottom (70 Input, 34 Output).
Step 9
In the layers palette, set this layer to Multiply and reduce the opacity to 20-40%. Instead of Curves, you can use on the duplicated High Pass layer from the Other sub-tab of the Filter tab. Set the value to 10. Set the layer to Overlay mode. Save the image in.png"


