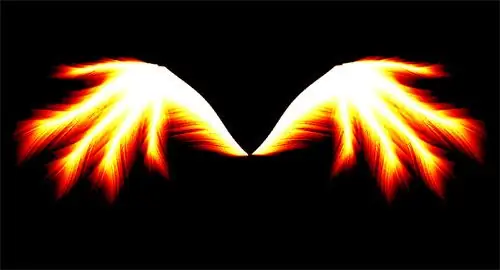
Many wondered how to give themselves an angelic look in the photograph, or, on the contrary, to show a devilish sparkle. The easiest and fastest way is to use Photoshop brushes. But the quality of such wings, to put it mildly, wishes to leave the best. Therefore, it is worth using another option.

Instructions
Step 1
Go to the File menu and create a new document. Choose the size as you wish, but still, for convenience, the size is desirable not small. Fill the bottom layer with black. To do this, use the Paint Bucket tool.
Step 2
Create a new layer. Select "Straight Lasso" from the toolbar. Use it to draw a wedge so that the sharp end points to the right. Next, fill the drawn shape with white. Go to the menu "Selection" -> "Deselect". Next, in the "Edit" menu, select "Free Transform" and rotate the wedge approximately 20 degrees. Press Enter.
Step 3
Select "Filter" -> "Stylize" -> "Wind". Check the box next to Left. Apply this filter as many times as necessary to achieve the result, depending on the size of the image. Then apply the free transform again and rotate the drawing 40 degrees in the opposite direction. Apply the wind filter again four times. Return the wedge to its original position using a free transform. Apply the wind filter again, but twice. Move the resulting feather up and duplicate the layer four times. The idea is to place these feathers like a fan. To do this, also use free transform. Place the pen on each layer in a specific position. After that turn off the visibility of the lower layer and merge all the previous layers by choosing the "Merge Visible" item. Make the bottom layer visible again.
Step 4
Use the Straight Lasso Tool and draw the same wedge at an angle to your wing. The sharp edge should point in the opposite direction - to the left. Create a new layer, fill the wedge with white and don't forget to remove the selection. Apply the wind filter three times. Repeat this procedure until the desired result is achieved. Glue the feathers layer. In order to give color to the feathers, go to the menu "Image" -> "Hue / Saturation". Check the "Toning" box and choose a darker color. This is for convenience.
Step 5
Go to the "Filter" menu and select "Distort" -> "Wave". Set the number of generators to 1, and select the rest of the numbers individually for your image. Change the wing color back to white via the Hue / Saturation menu. In the "Image" menu, set the mode to "Grayscale". Then select "Image" -> "Mode" -> "Indexed Colors". Here go to the color table and set a completely black body and click OK. The wing is ready.


